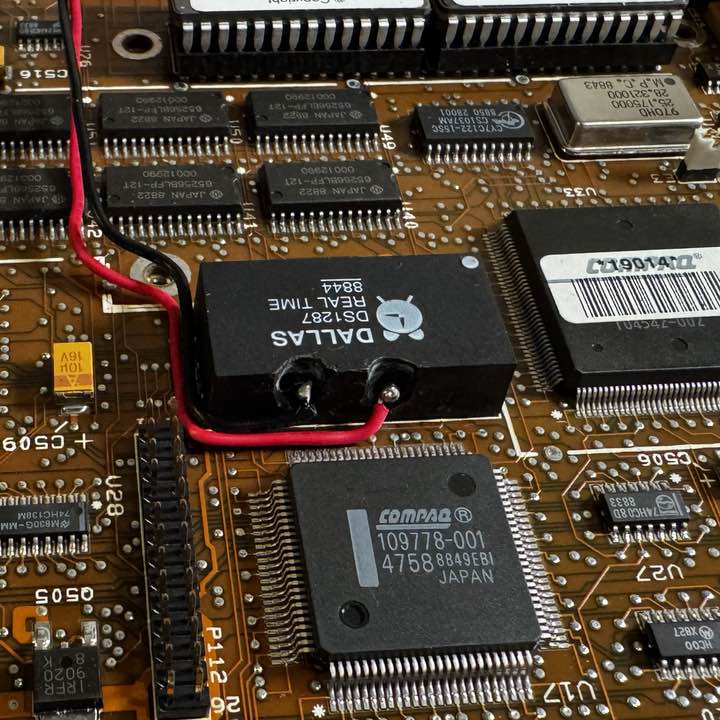
As mentioned in my earlier post, I needed to mod the onboard non-replaceable RTC so it would accept an external battery.
I found a few posts, including this one, by Peter Wendt, who has a very nice diagram showing the theory of what we’re going to do here. This Post and This Post on Terry Stweart’s blog also was extremely helpful.
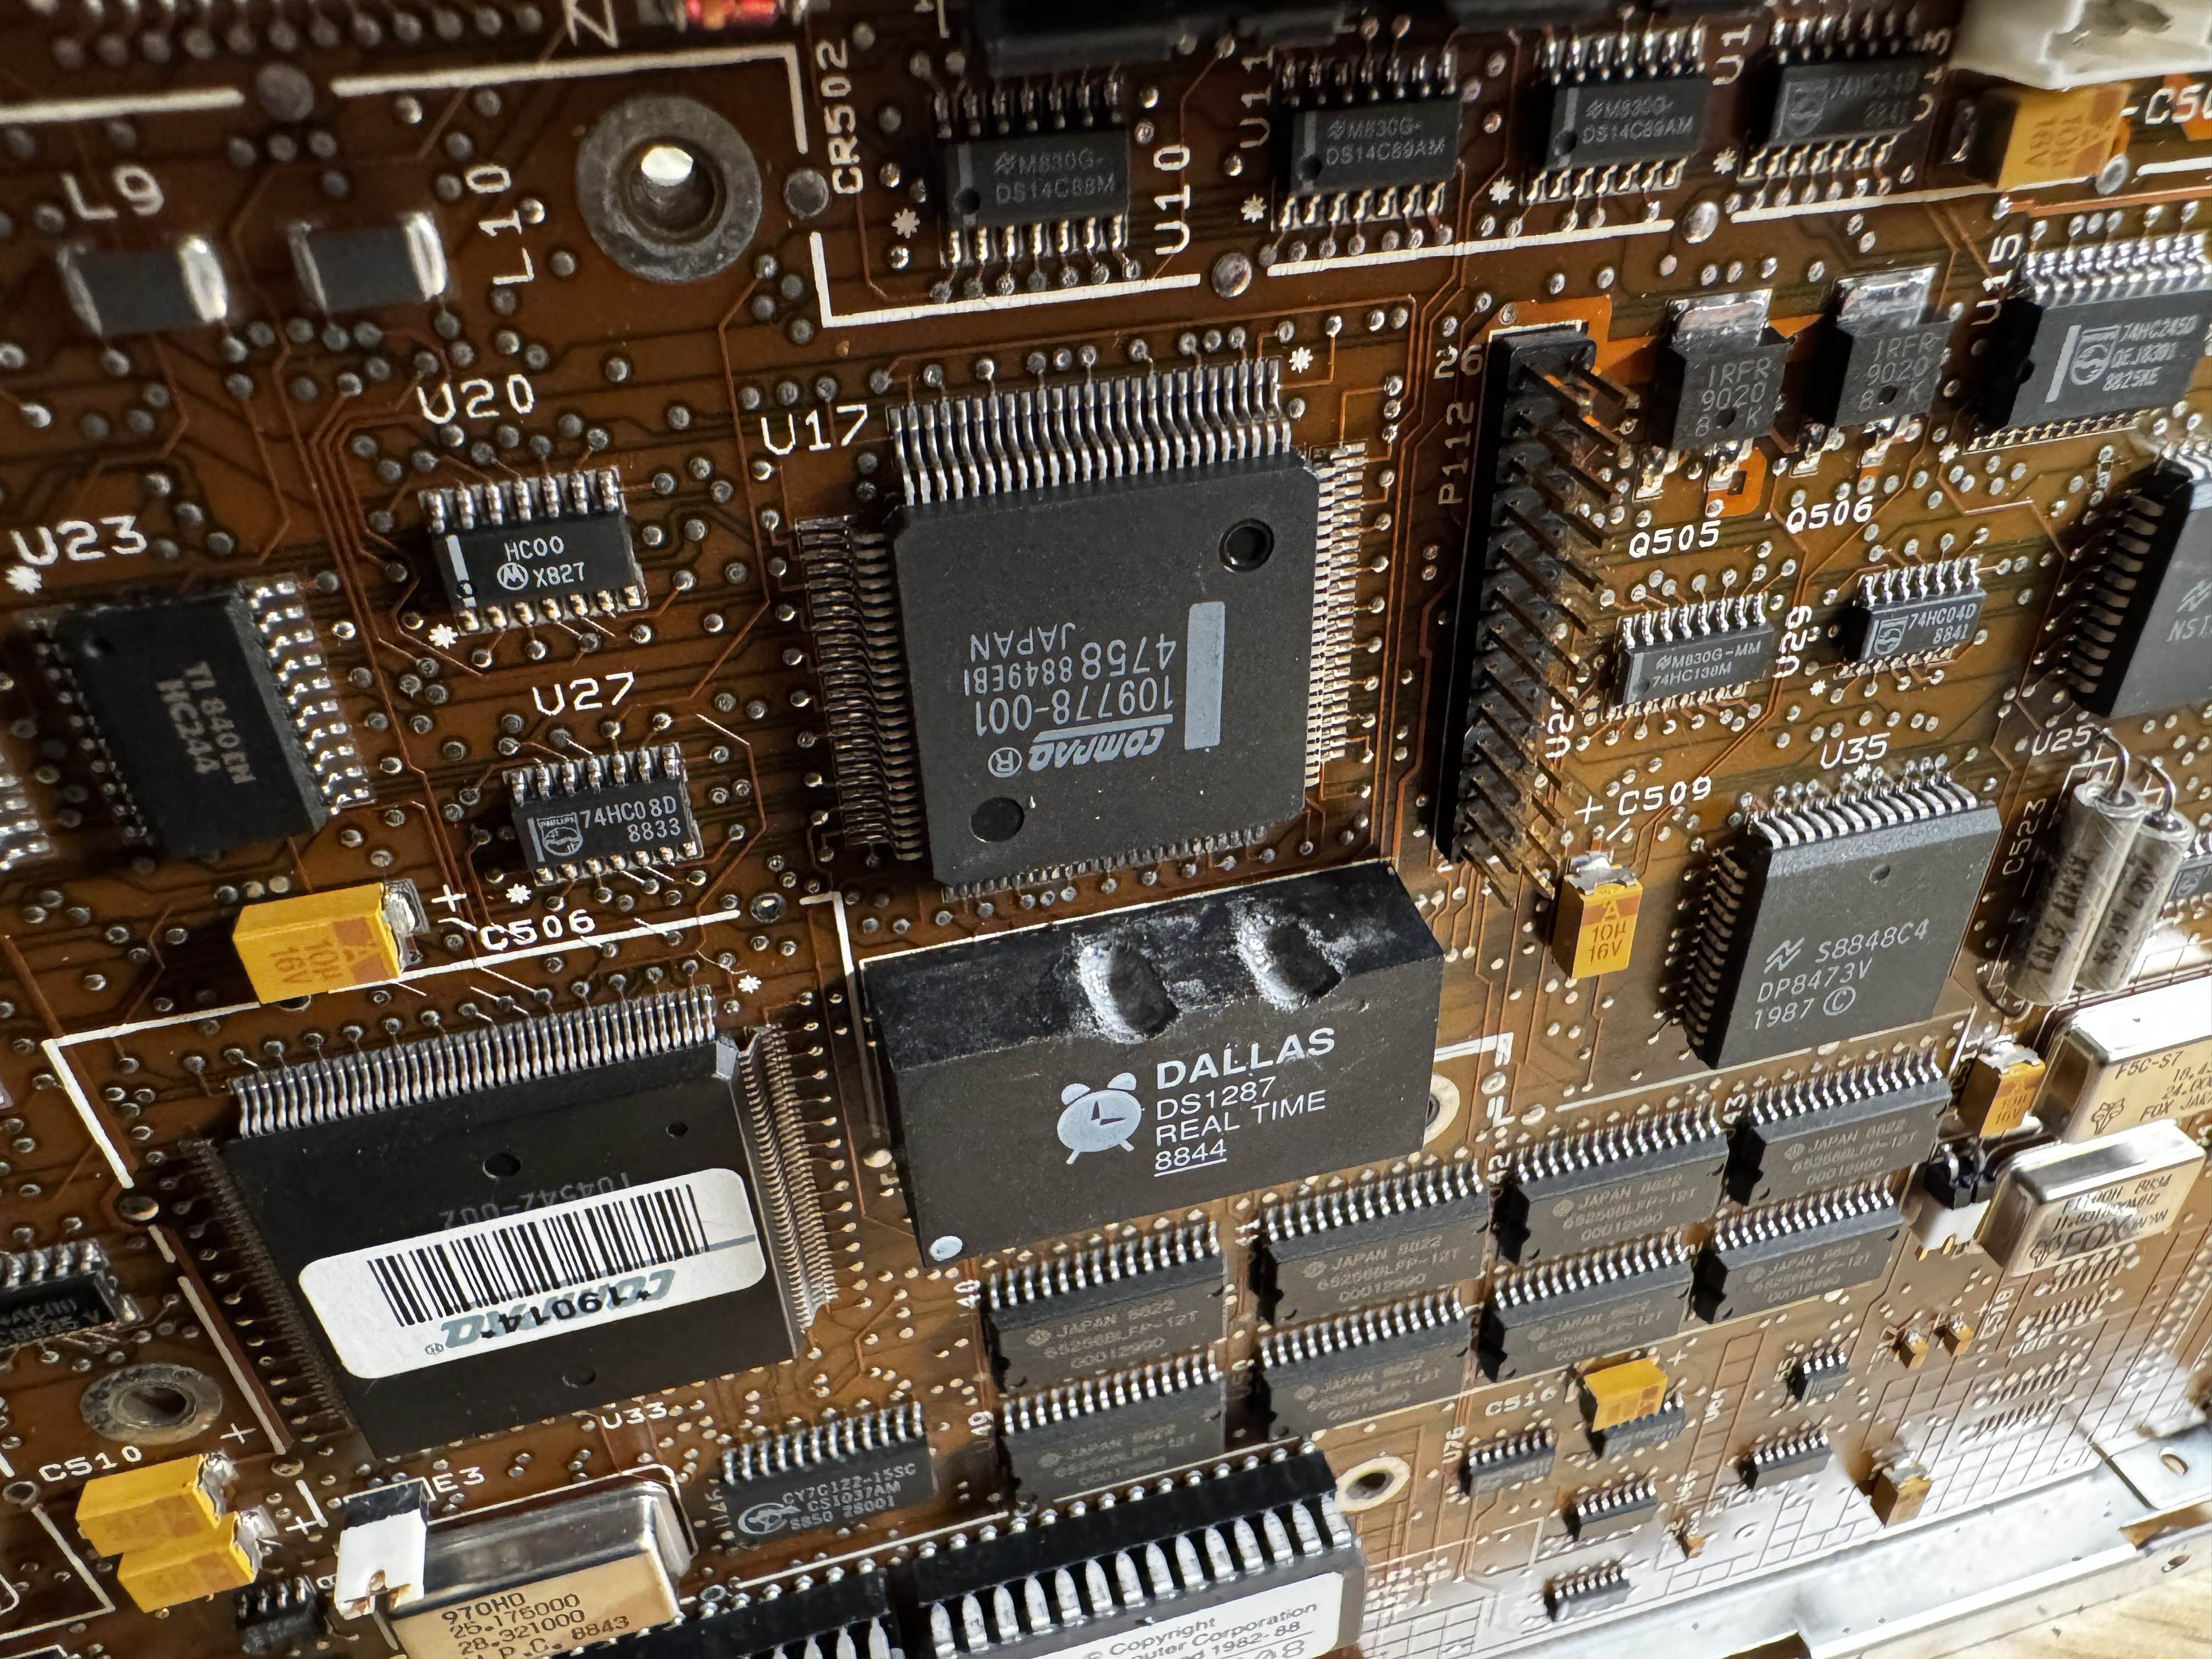
Dremel Work
For this, I started with a very tiny dremel bit, slowly cutting a channel into the side of the RTC. I placed a 1” skirt of kapton tape around the RTC chip while doing this (not pictured), to avoid any accidents where I damaged the almost 40-year old motherboard.
Disconnecting the Internal Battery
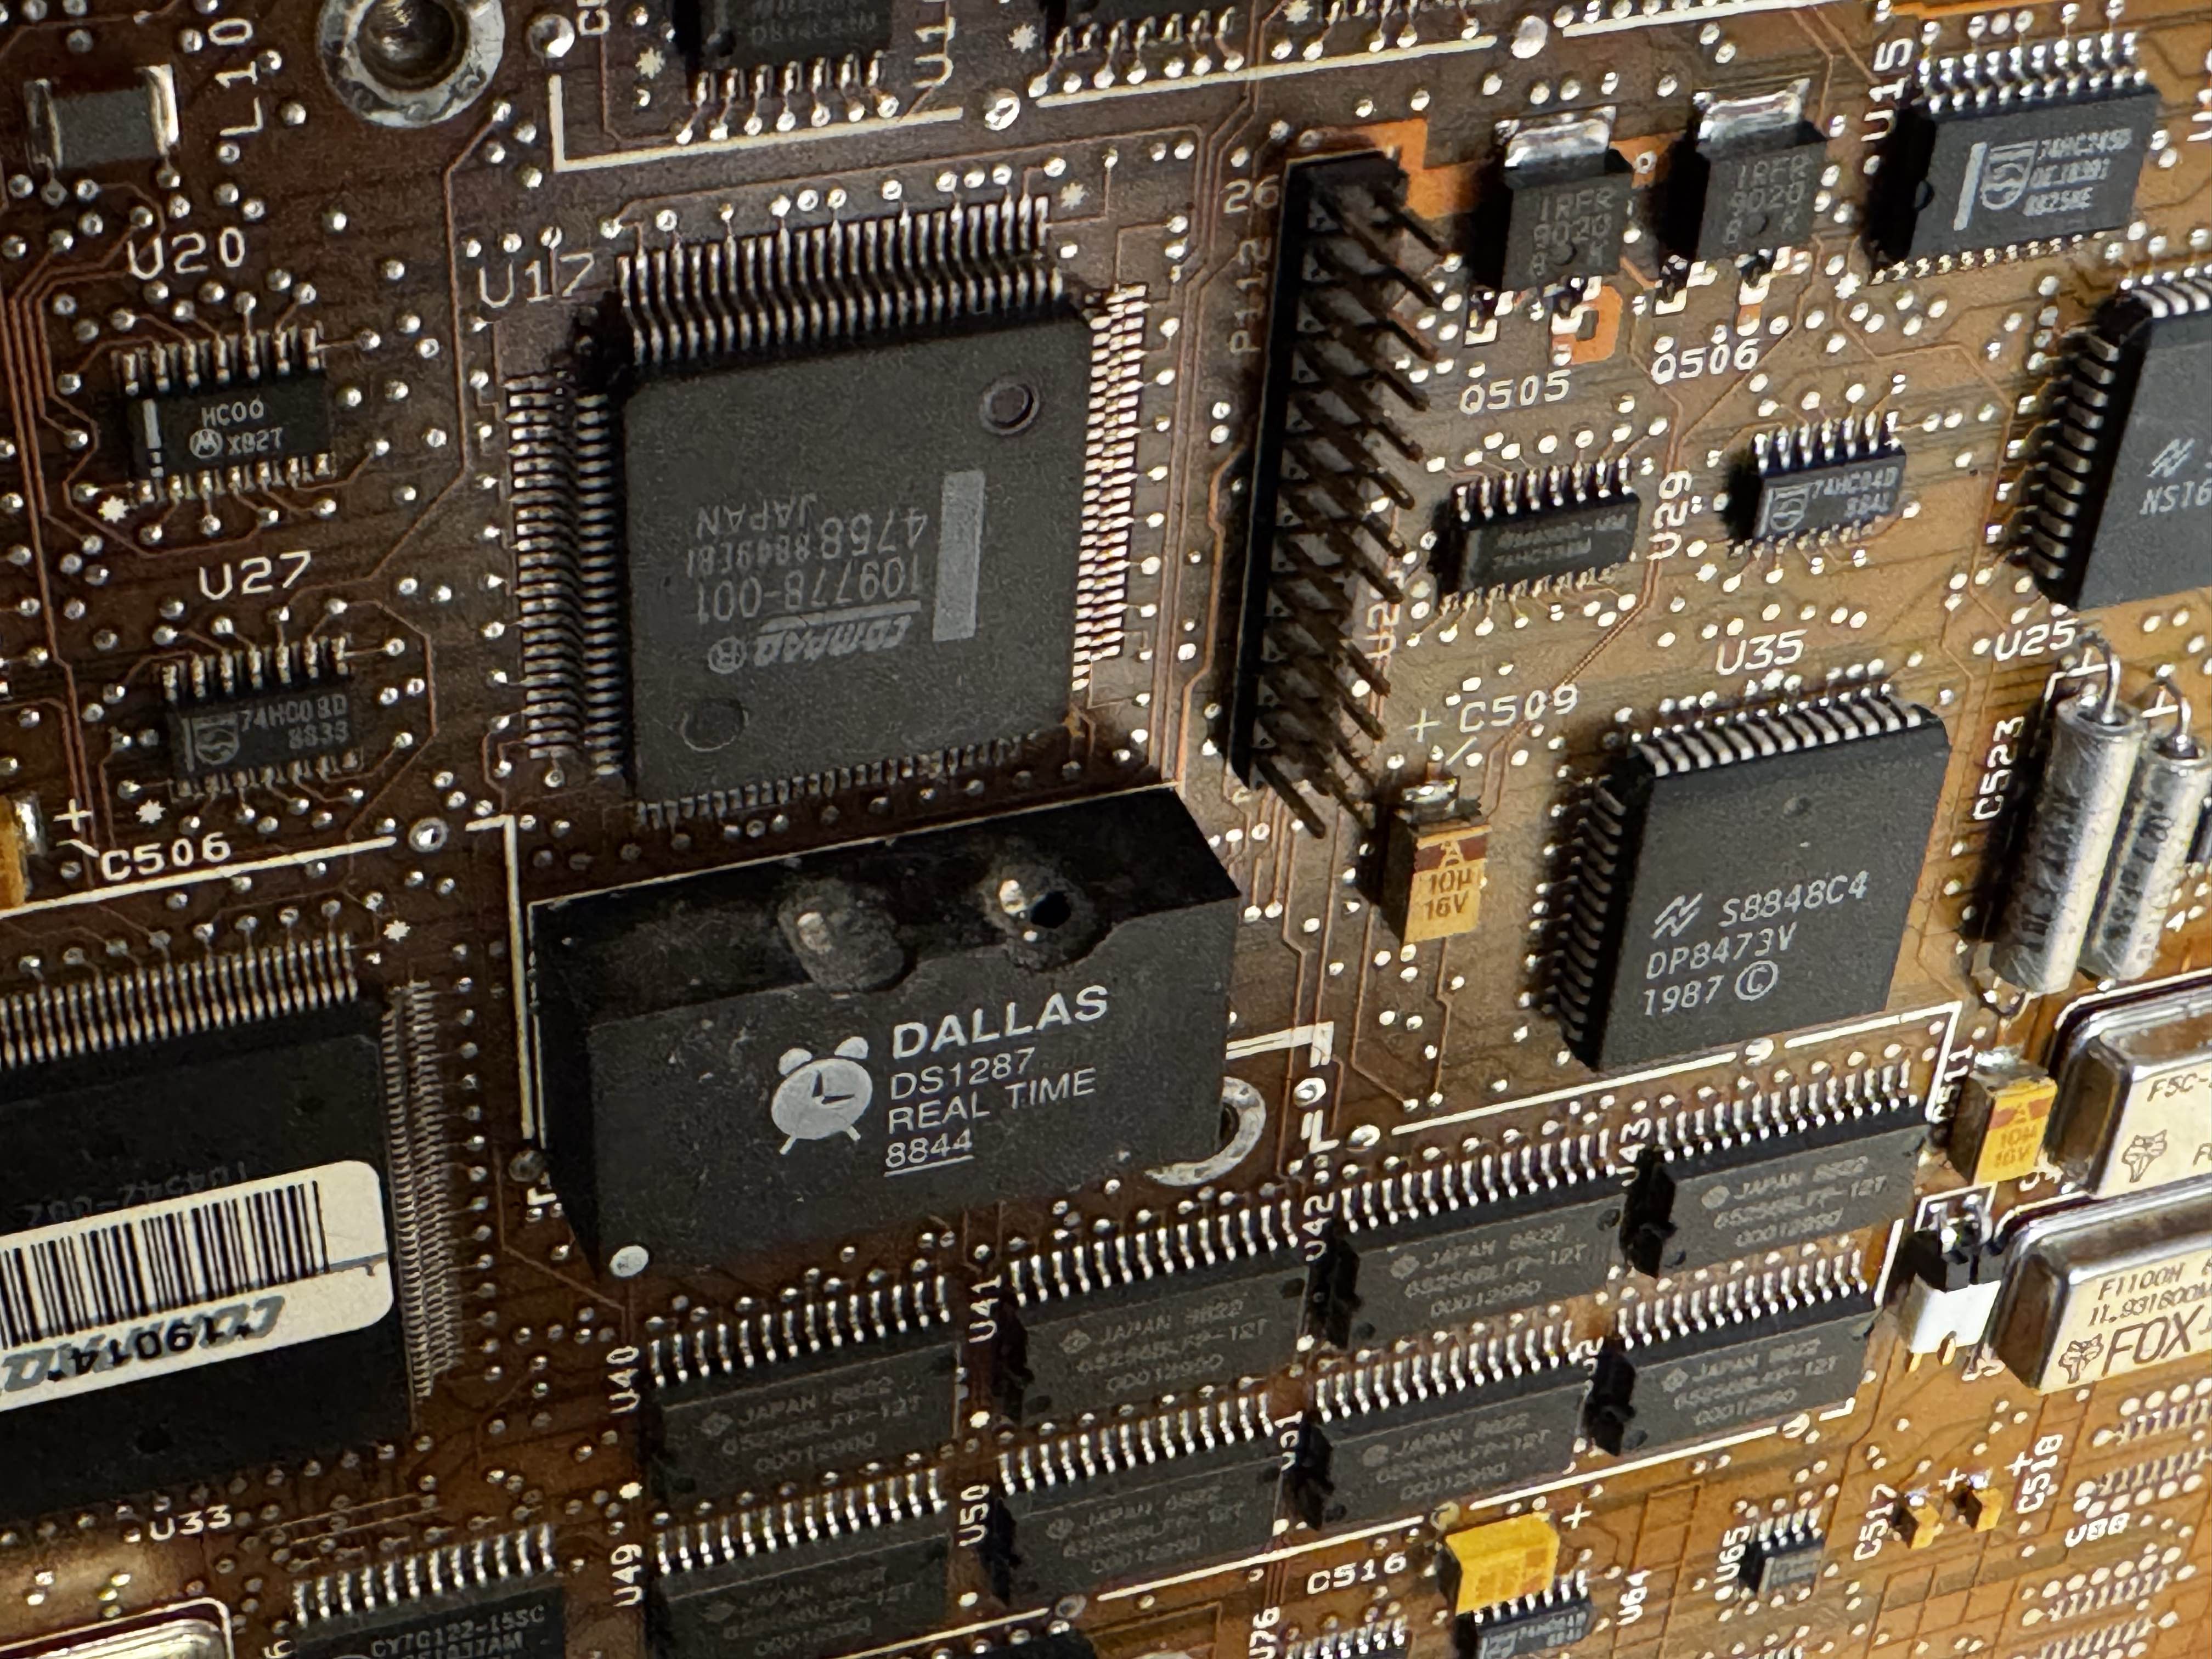
I then got far enough to be able to cut the ground trace from the internal battery (the right hand side). If you look close, you’ll see both metal parts exposed. Also, the epoxy seems to be shallow in one spot here, so I had to be careful to avoid getting any metal inside as I cut the trace:
Soldering
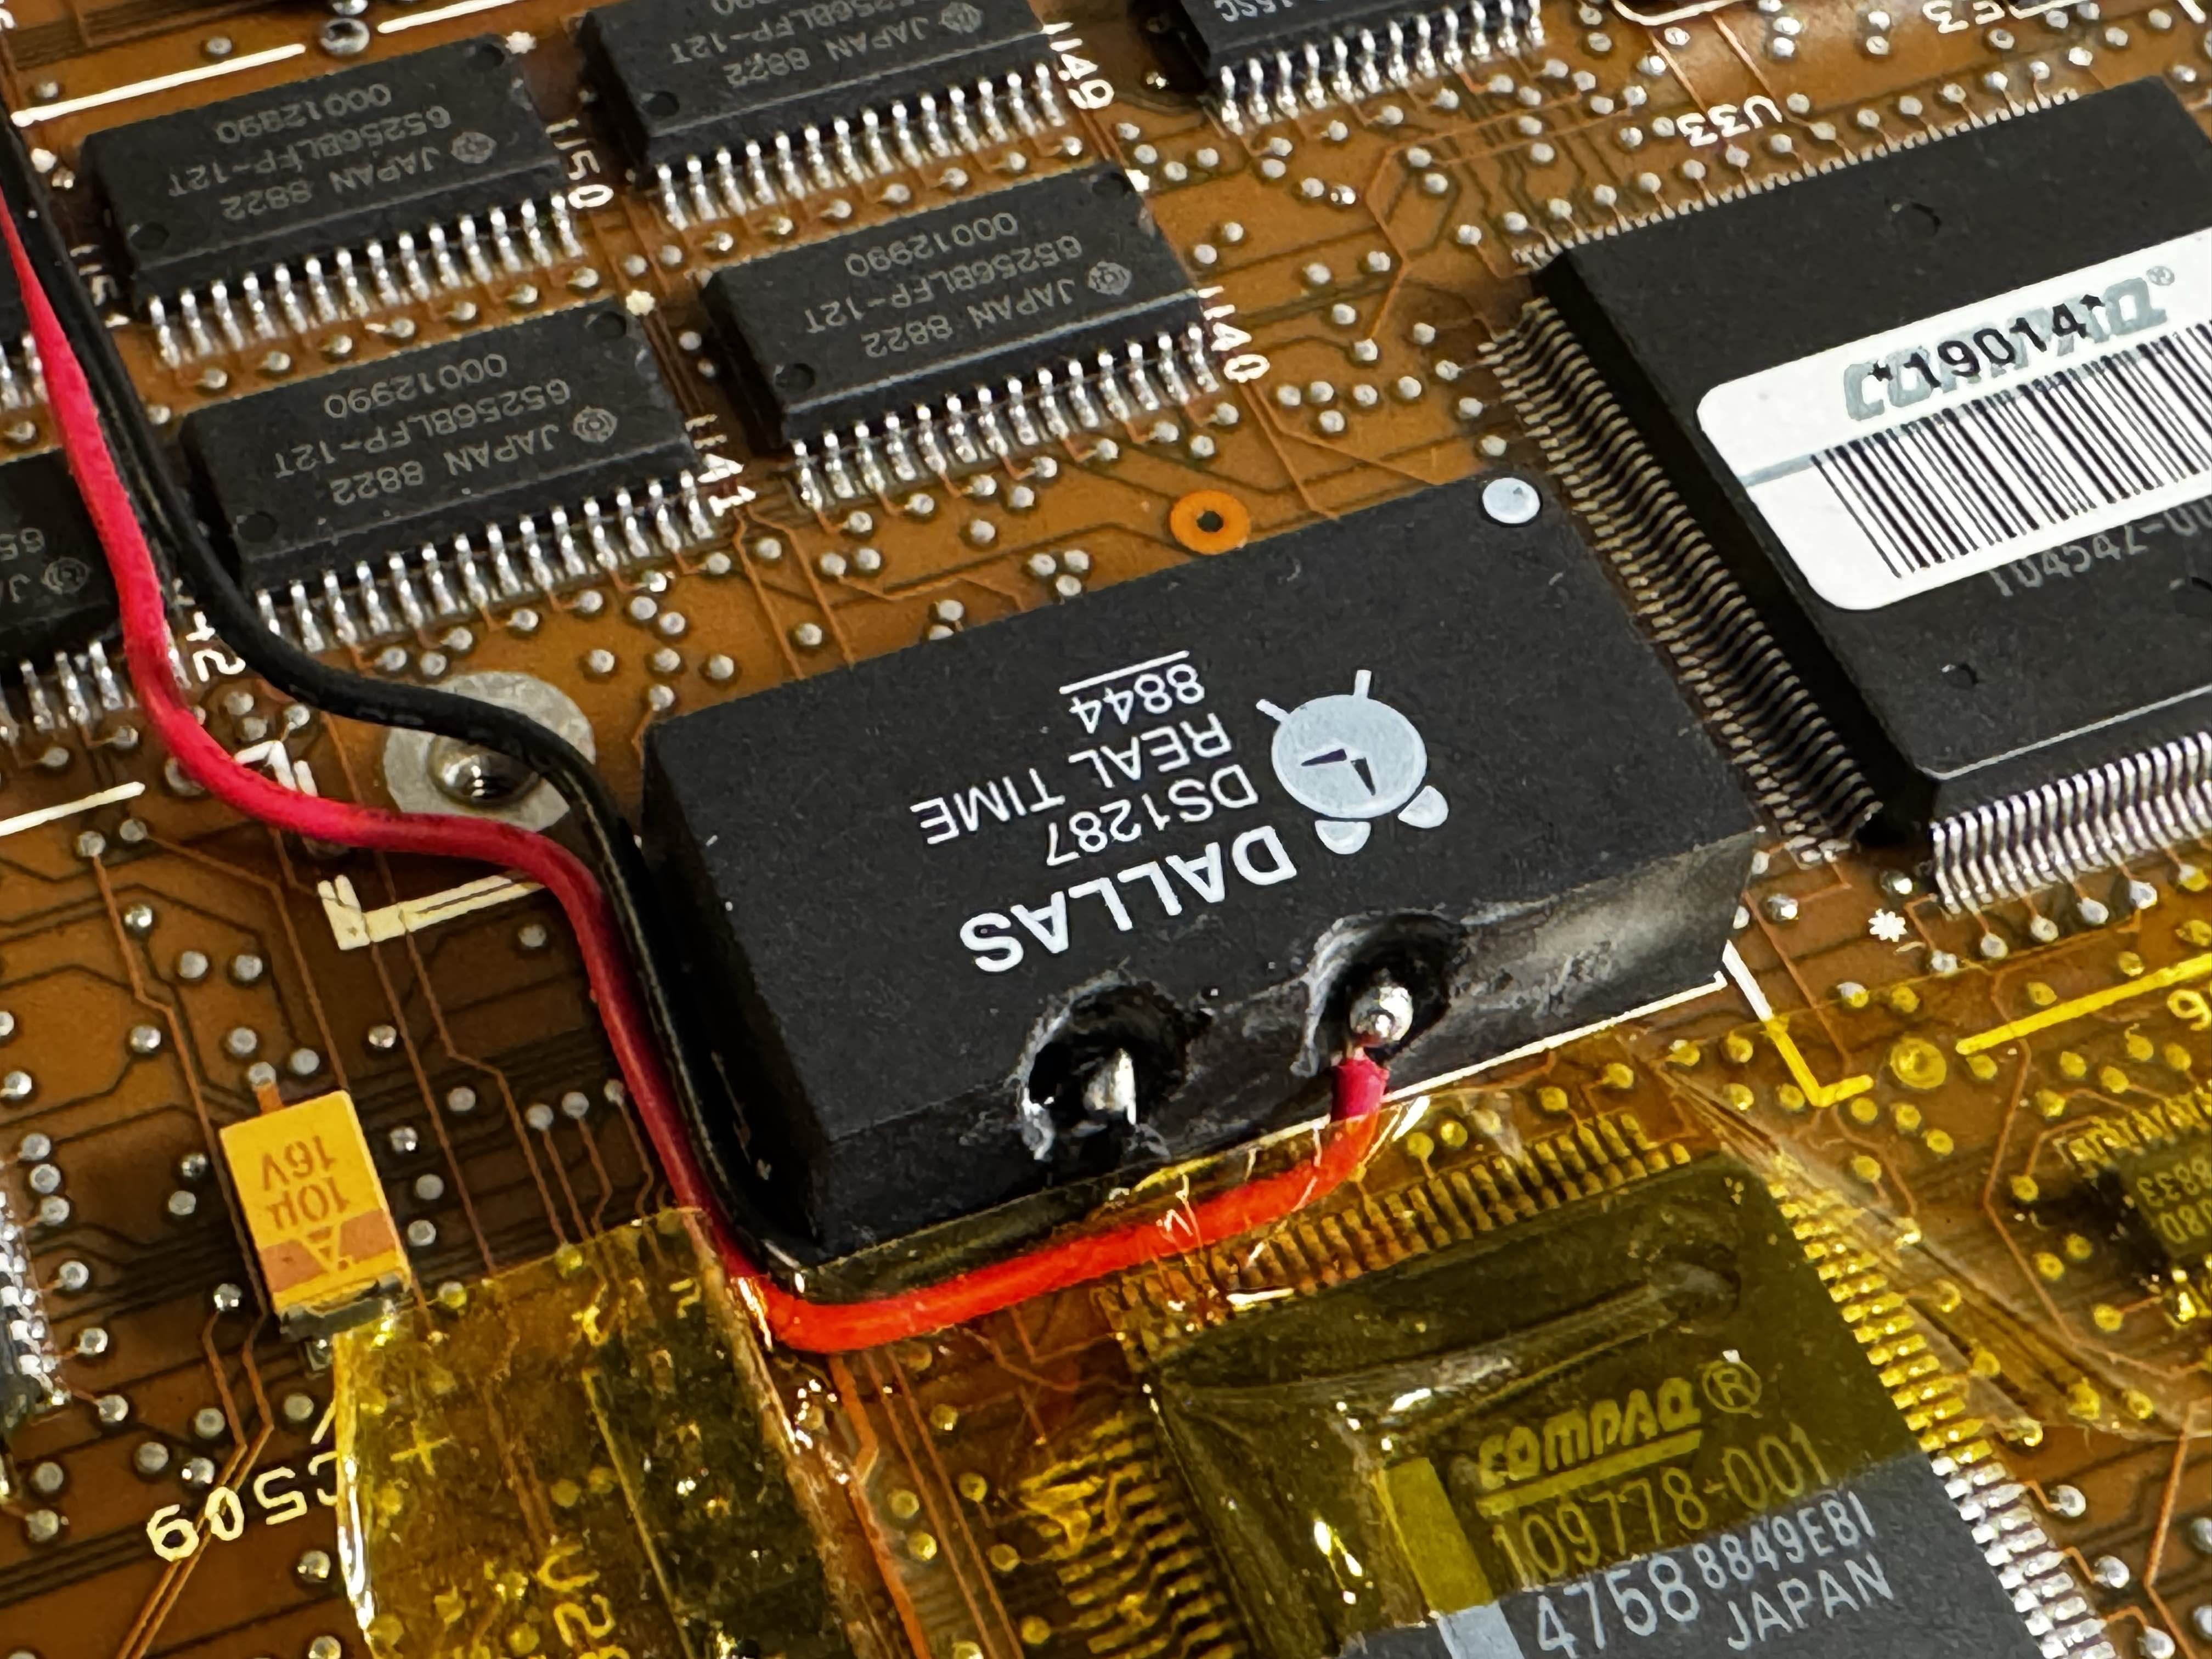
First, I applied a little solder to each of the points I was attaching wires to. This way, it would be much easier to do later on when attaching the wires:

Then, I used some more kapton tape to hold my bent solid core wires in place (and also preventing damage to the board).
Final Connection
Then, with some final cleaning, I arrived at this:
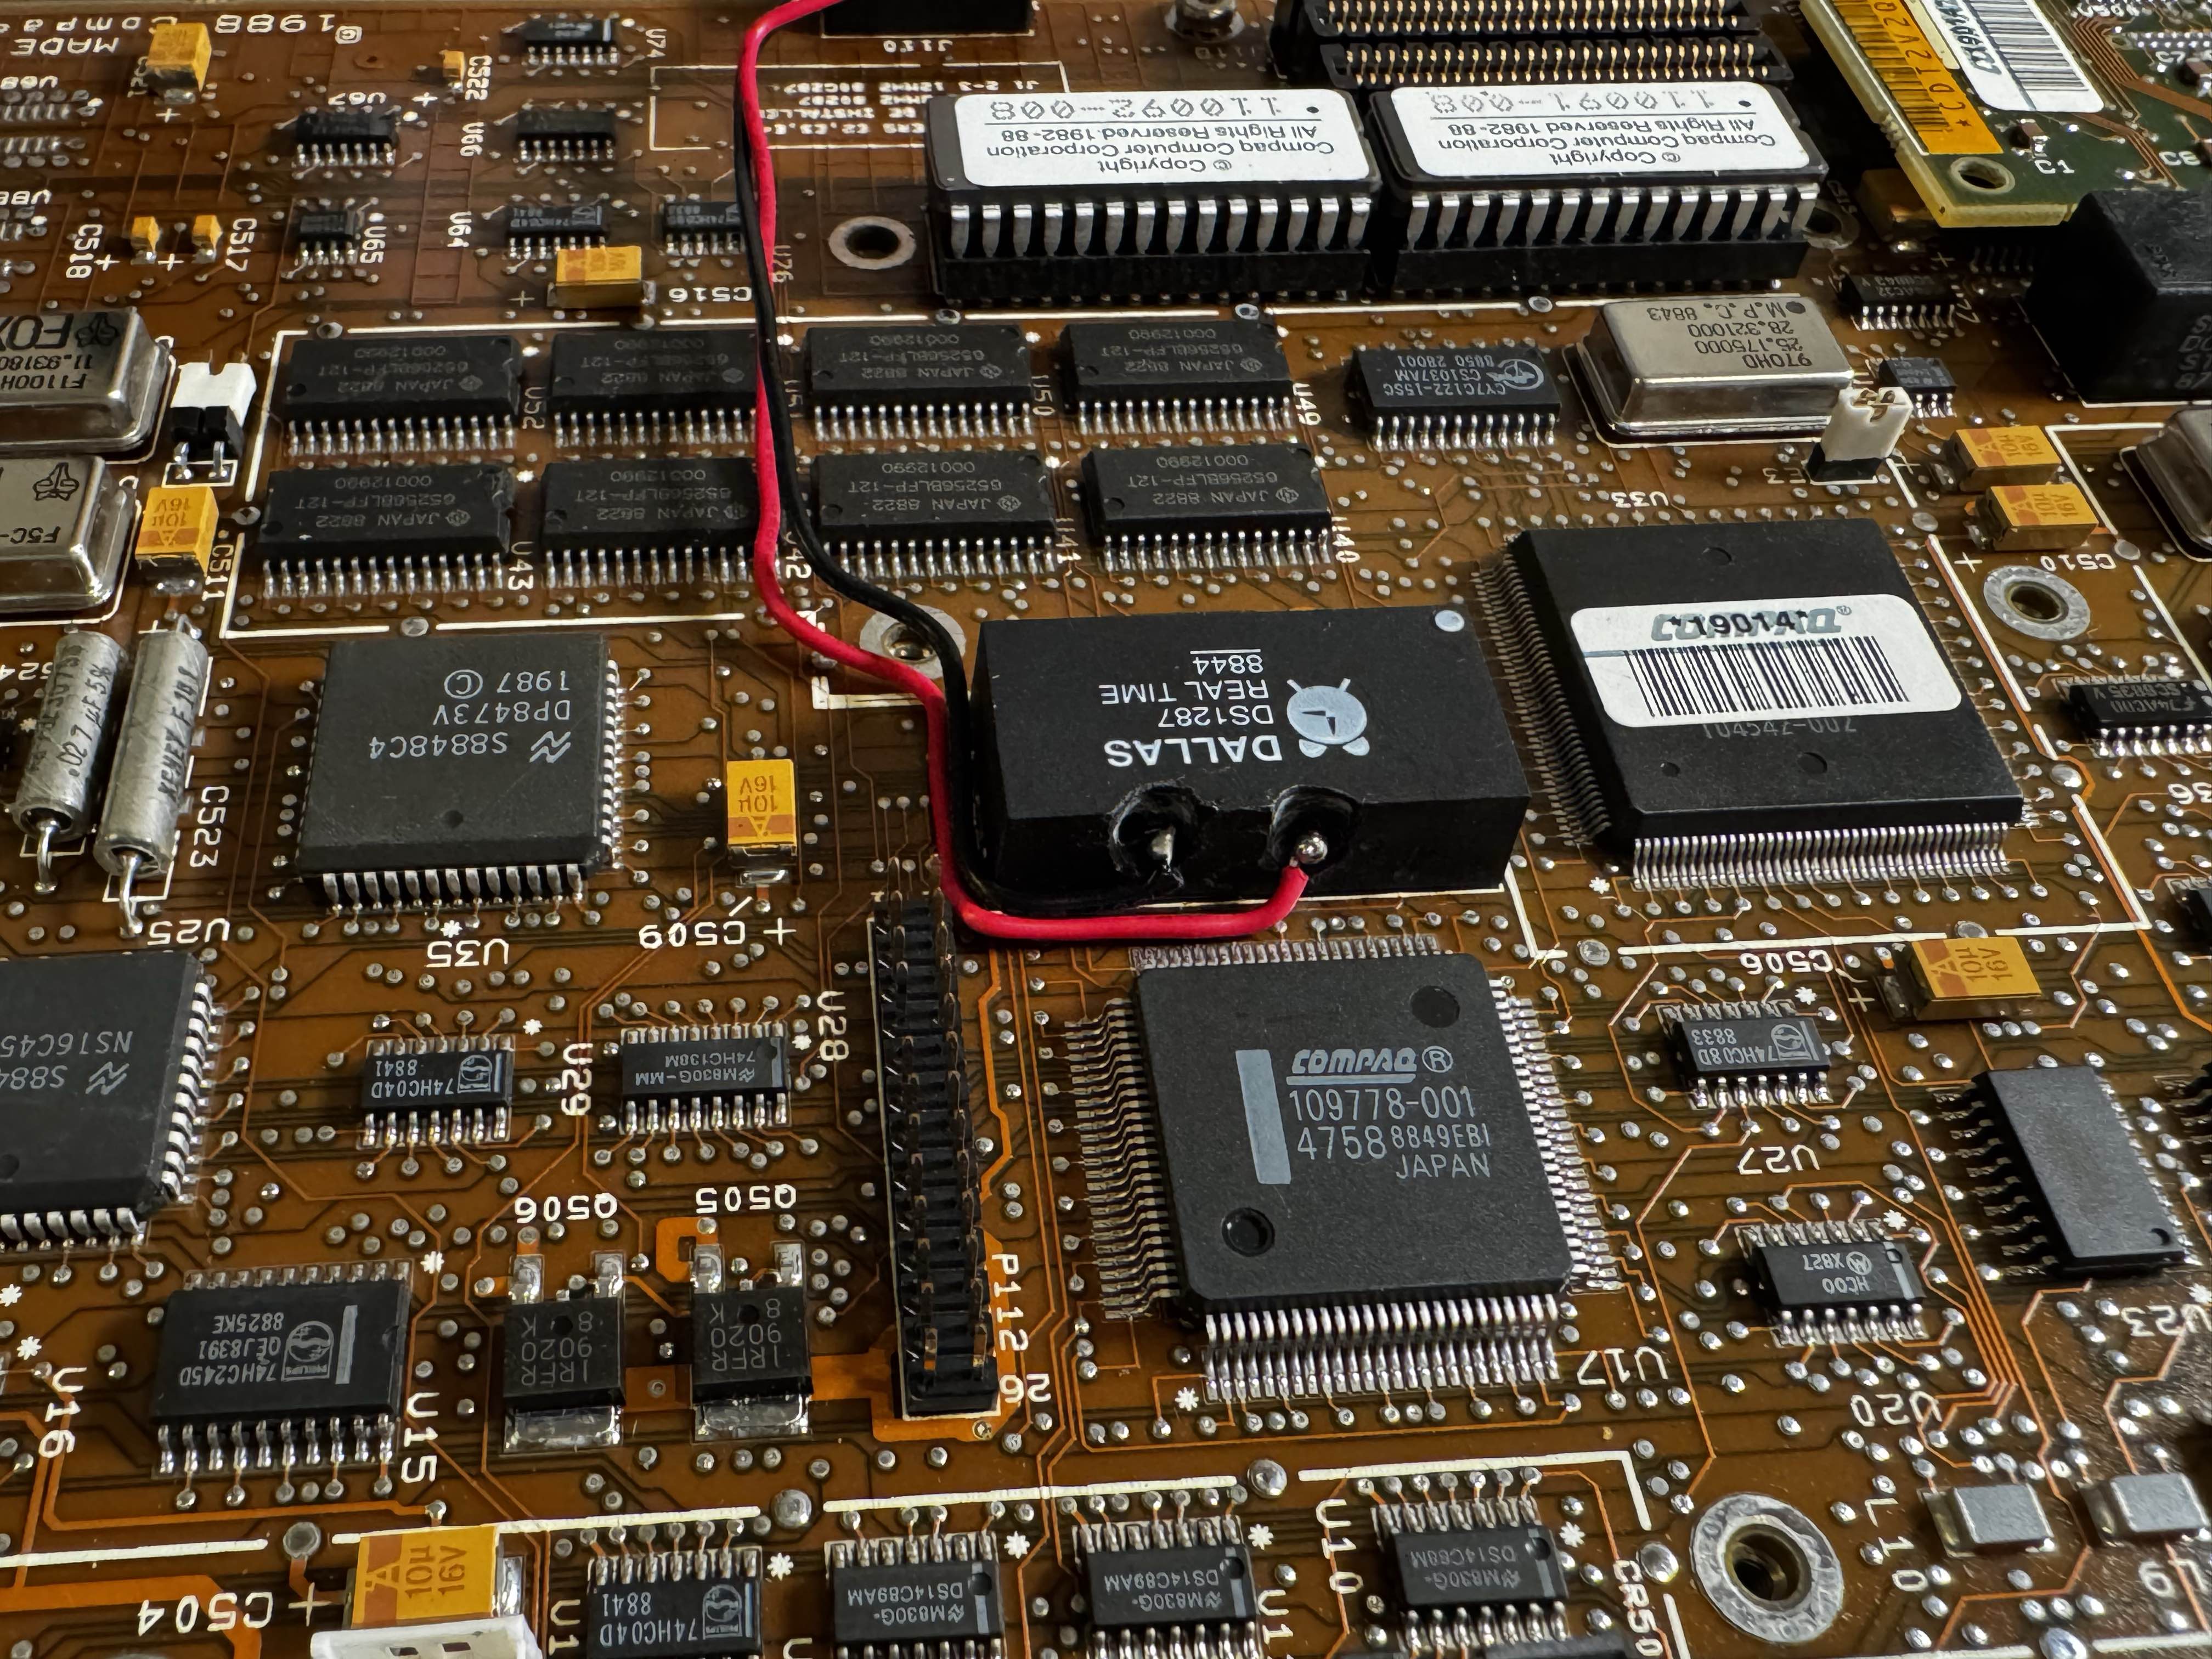
Then, I applied some black silicone conformal coating to seal the cuts in the side:
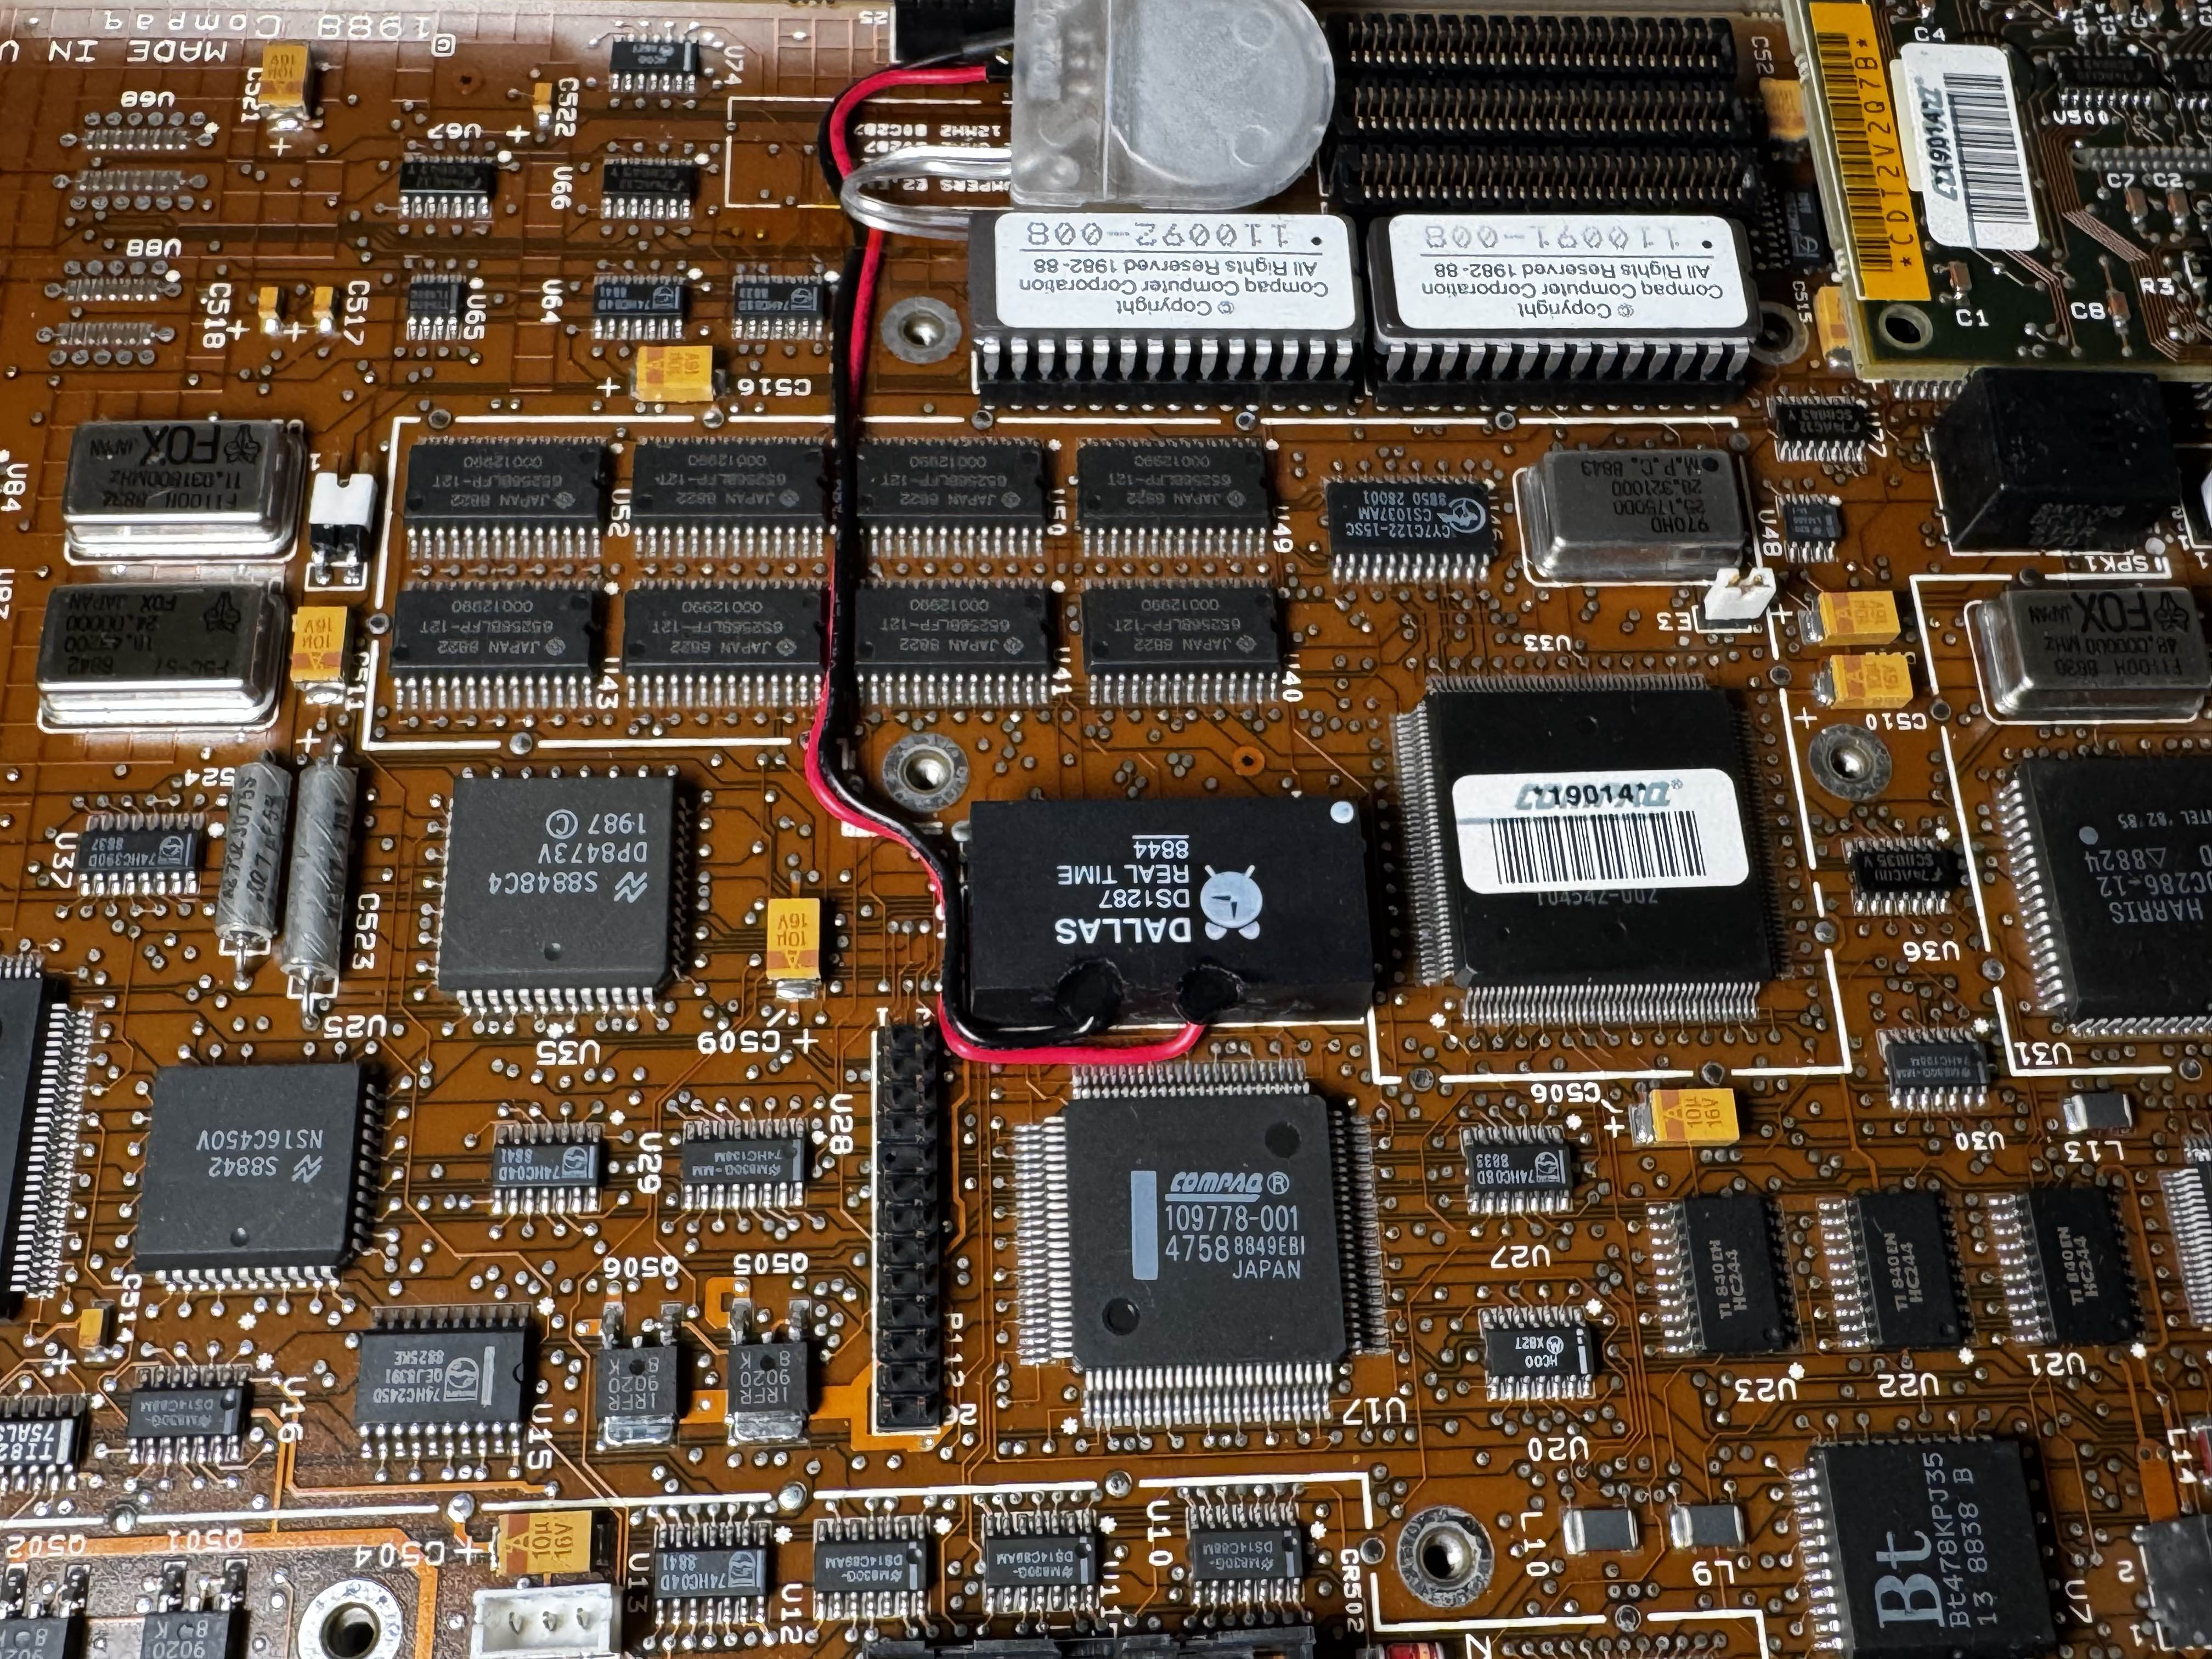
Cable Routing
I then routed the cables to the front, where there is a space accessible without totally tearing the machine down. To get to this, you just need to unscrew the main case, detach the screen, and remove 4 screws. Which is much nicer than the 20-some odd screws and plugs you need to remove to get to to the motherboard.
I soldered my CR2032 battery holder (being sure to get the polarities right), and sealed the ends with heat shrink. With this configuration, you can also turn the battery off (if for some reason you want to reset the RTC), and the holder can be removed somewhat to enable easier battery changes.
I may change this to a PCB that accepts those sealed RTC clocks with a little JST connector at some point, but I had these CR2023 holders available. I left extra wire just in case.

Final Assembly
I did a little cleaning on the plastic outer case, then once the silicone had cured enough, I re-assembled the computer.
Does it work?
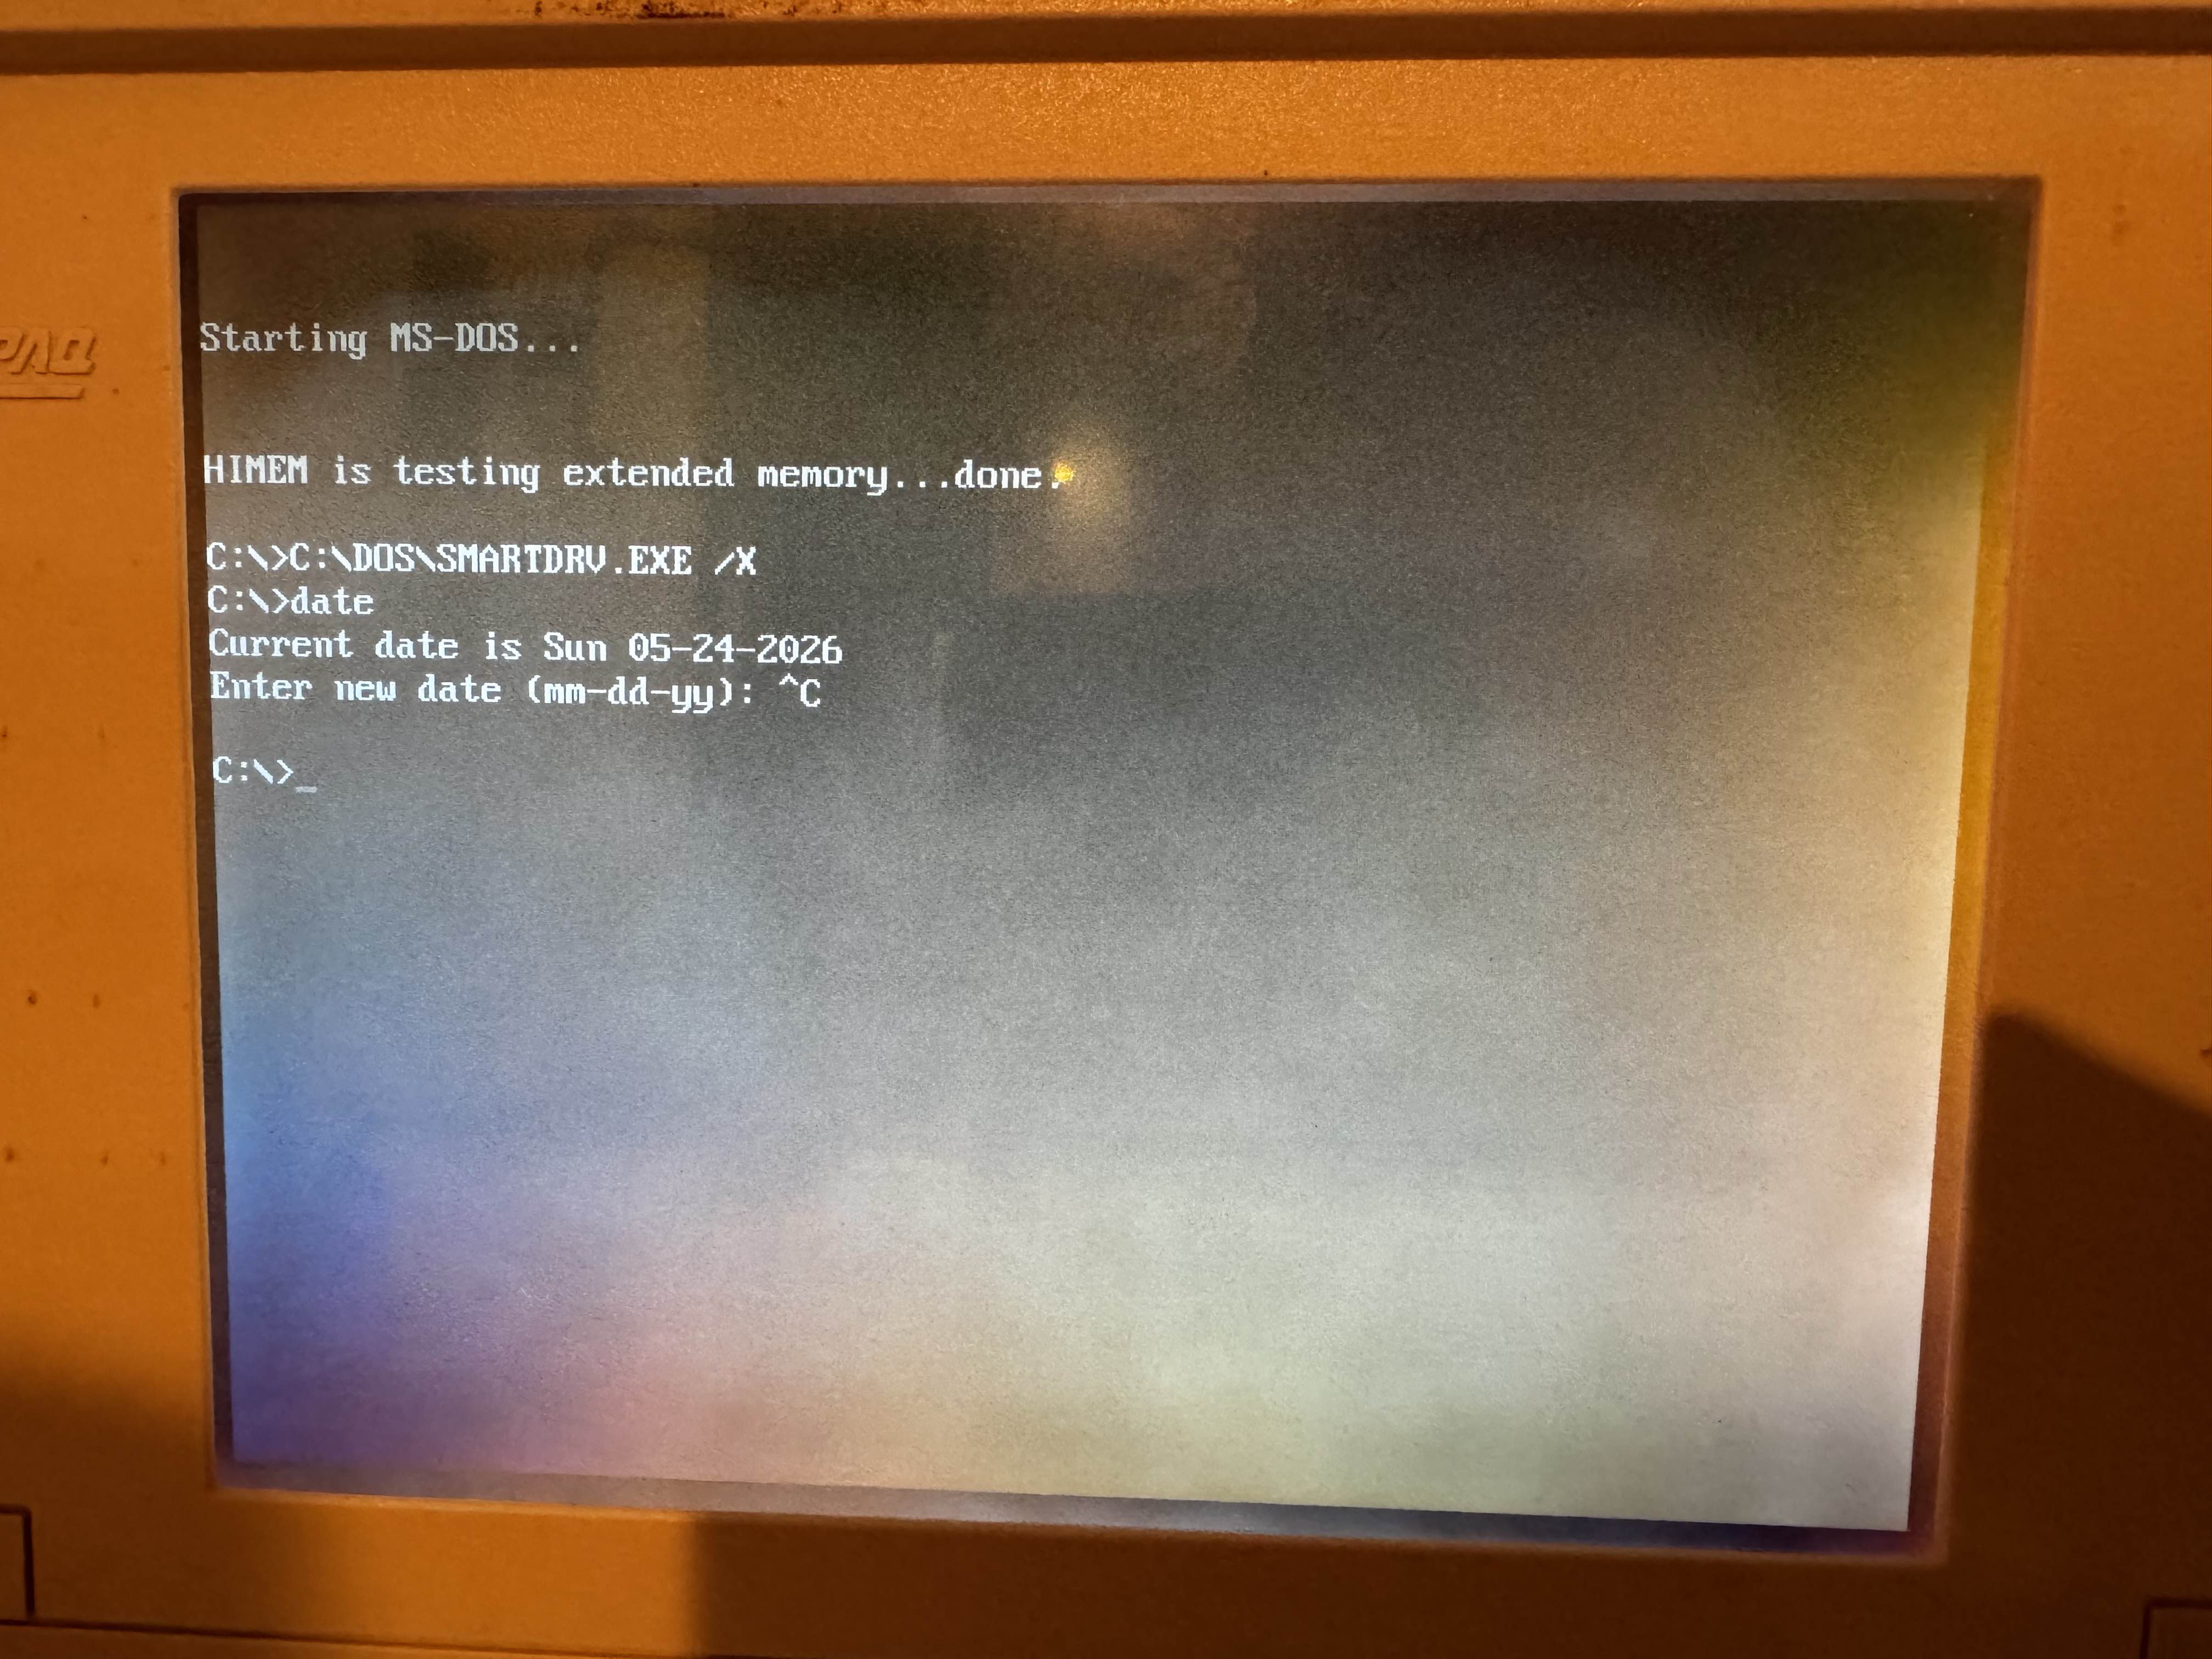
There’s only one way to find out… re-assemble far enough to use our floppy drive and hard disk, to re-configure our drive, and set the date. Then, remove power. After re-connecting, we had a clean boot with no datetime or configuration errors!:
Should you do this?
It’s definitely much nicer to have this mod done than it is to need to re-configure the laptop each time. However, this is the kind of thing that if you slip with the Dremel… there’s a good chance it won’t boot again. So take that into consideration. Do so at your own risk.
There are also software solutions I have found online to have a special boot floppy you use to reconfigure each time, but I figured that wasn’t worth the time (and what if I’m on the go and forget my floppy disk?!?)