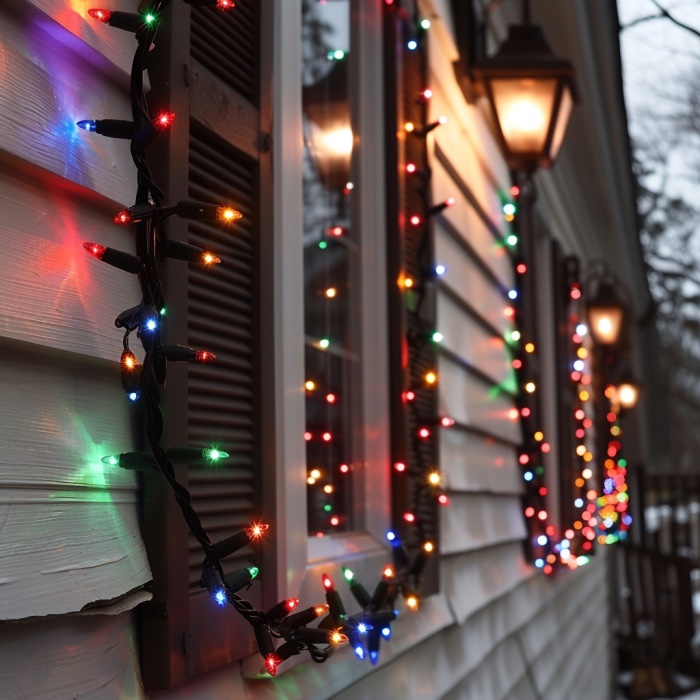
It’s getting to be that time of year again - so I thought I’d post some info about debugging those broken LED light strands.
As always, fixing electronics involves some danger, and damaged light strings can pose an electrocution hazard. Take all necessary precautions, and follow the below instructions at your own risk. When in doubt, just throw it out and buy a new light set instead of electrocuting yourself.
I take my holiday decorations quite seriously, and I’m at the point where I have a spreadsheet to track which lights need repair. I’ve got over 75 strings in my tracking sheet, over 50 of which are in active use (I keep older & broken ones for spare parts & bulbs).
Most Common Failure - Broken LED Wires
The most common issue I have seen is where the wires in a bulb break due to corrosion, and this causes the set to stop working. Luckily - I have found an easy way to try and locate, which tends to work pretty well. You simply apply a light rotation to each bulb, and more often than not, the broken bulb will rotate much more than the others. Remove, and replace.
Sometimes, when doing this method, the lights will flicker on and off as the broken wires temporarily connect.
Video:
Lights Troubleshooting / Debugging
Other issues
- No Lights Work
- Part of set is out, but rest lights
- One Segment is very dim
- Lights flicker as the set is moved or shaken
- A single bulb is off or dim
No Lights Work
Probable cause - blown fuses. To check this:
- Slide the door on the plug open which is located on the top of the wall plug for the set.
- If the fuses are cloudy or black, they’re definitely blown. You can hold them up to a light to inspect them and replace if you can’t see the filament inside the fuse. Sometimes, you may just need to replace it and see.
Unlikely cause - the fuses are fine, but multiple broken lights in each of the sections in the string cause it to not light. You’ll need to check every bulb.
Part of set is out, but rest lights
This is typically caused by either:
- One of the LEDs has a bad electrical connection or broken lead. (see section on checking bulbs)
- The wiring of the set itself is bad or loose (less common)
One segment is very dim
Sometimes, one segment is just very dim caused by a bad LED needing replacement. I’ve noticed in these cases the culprit is either not lighting at all or is even dimmer than the rest. When this happens, the broken segment often appears to be off unless the light set is seen in total darkness.
Lights flicker as the set is moved or shaken
This is often a mechanical failure of the LED lead itself, but the broken piece is still in place. As a result, it works still if you shake it. This will eventually stop happening, so if you plug the set in and gently manipulate each bulb individually, this will “lead” (haha, get it) - you to the bad LED.
Try using the method in my video above
If that doesn’t work, you may need to check each bulb
A single bulb is off or dim
LEDs often fail as a short-circuit, so one bulb actually burning out does not impact the rest of the strand. However it’s best to replace to keep your lights looking as good as possible!
Russ! We need to check every bulb.

If a section of lights or the whole strand is out, you’ll likely need to check every bulb.
LED Mechanical Failures
For LEDs, The common failure mode I have seen is that the lead wires coming out of the bottom of each LED light are broken. The leads are pretty fragile, are usually bent sharply to work within the light set. With the outdoor conditions, heating, cooling, and moisture, I have seen tons of my lights break at the bend point which in turn causes them to stop working.
Often, just pulling and visually checking each LED has two leads that are solidly attached will find this type of failure and replacing (potentially many) broken LEDs will make the set work.
For incandescent lights, troubleshooting should be a little easier, bunt out bulbs are either cloudy or blackened, and if they’re broken or crushed that’s a dead giveaway you should replace.
Electrically checking bulbs
A quick method to do this is to use known a good light set, plug both in, and swap bulbs back and forth to see which one causes the good set to stop working. If you find that, likely that is (one) of the problem LEDs.
LED bulbs can be checked electrically using a 5V power supply and a 200 Ohm resistor (resistor value may vary, increase when in doubt). Test circuits made in this way also work for incandescent lights. You can make a cheap 5v supply by using a USB to DC barrel jack wire, and a DC barrel jack to terminal block adapter, combined with a normal USB phone charger. I wouldn’t recommend plugging custom circuits into expensive computers or electronics, however, in case things go awry.
Pre-made Light Checker Tool
I’ve heard good things online about tools like this, but I’ve never felt the need to purchase one. I guess, attempt at your own risk.
Replacing LEDs
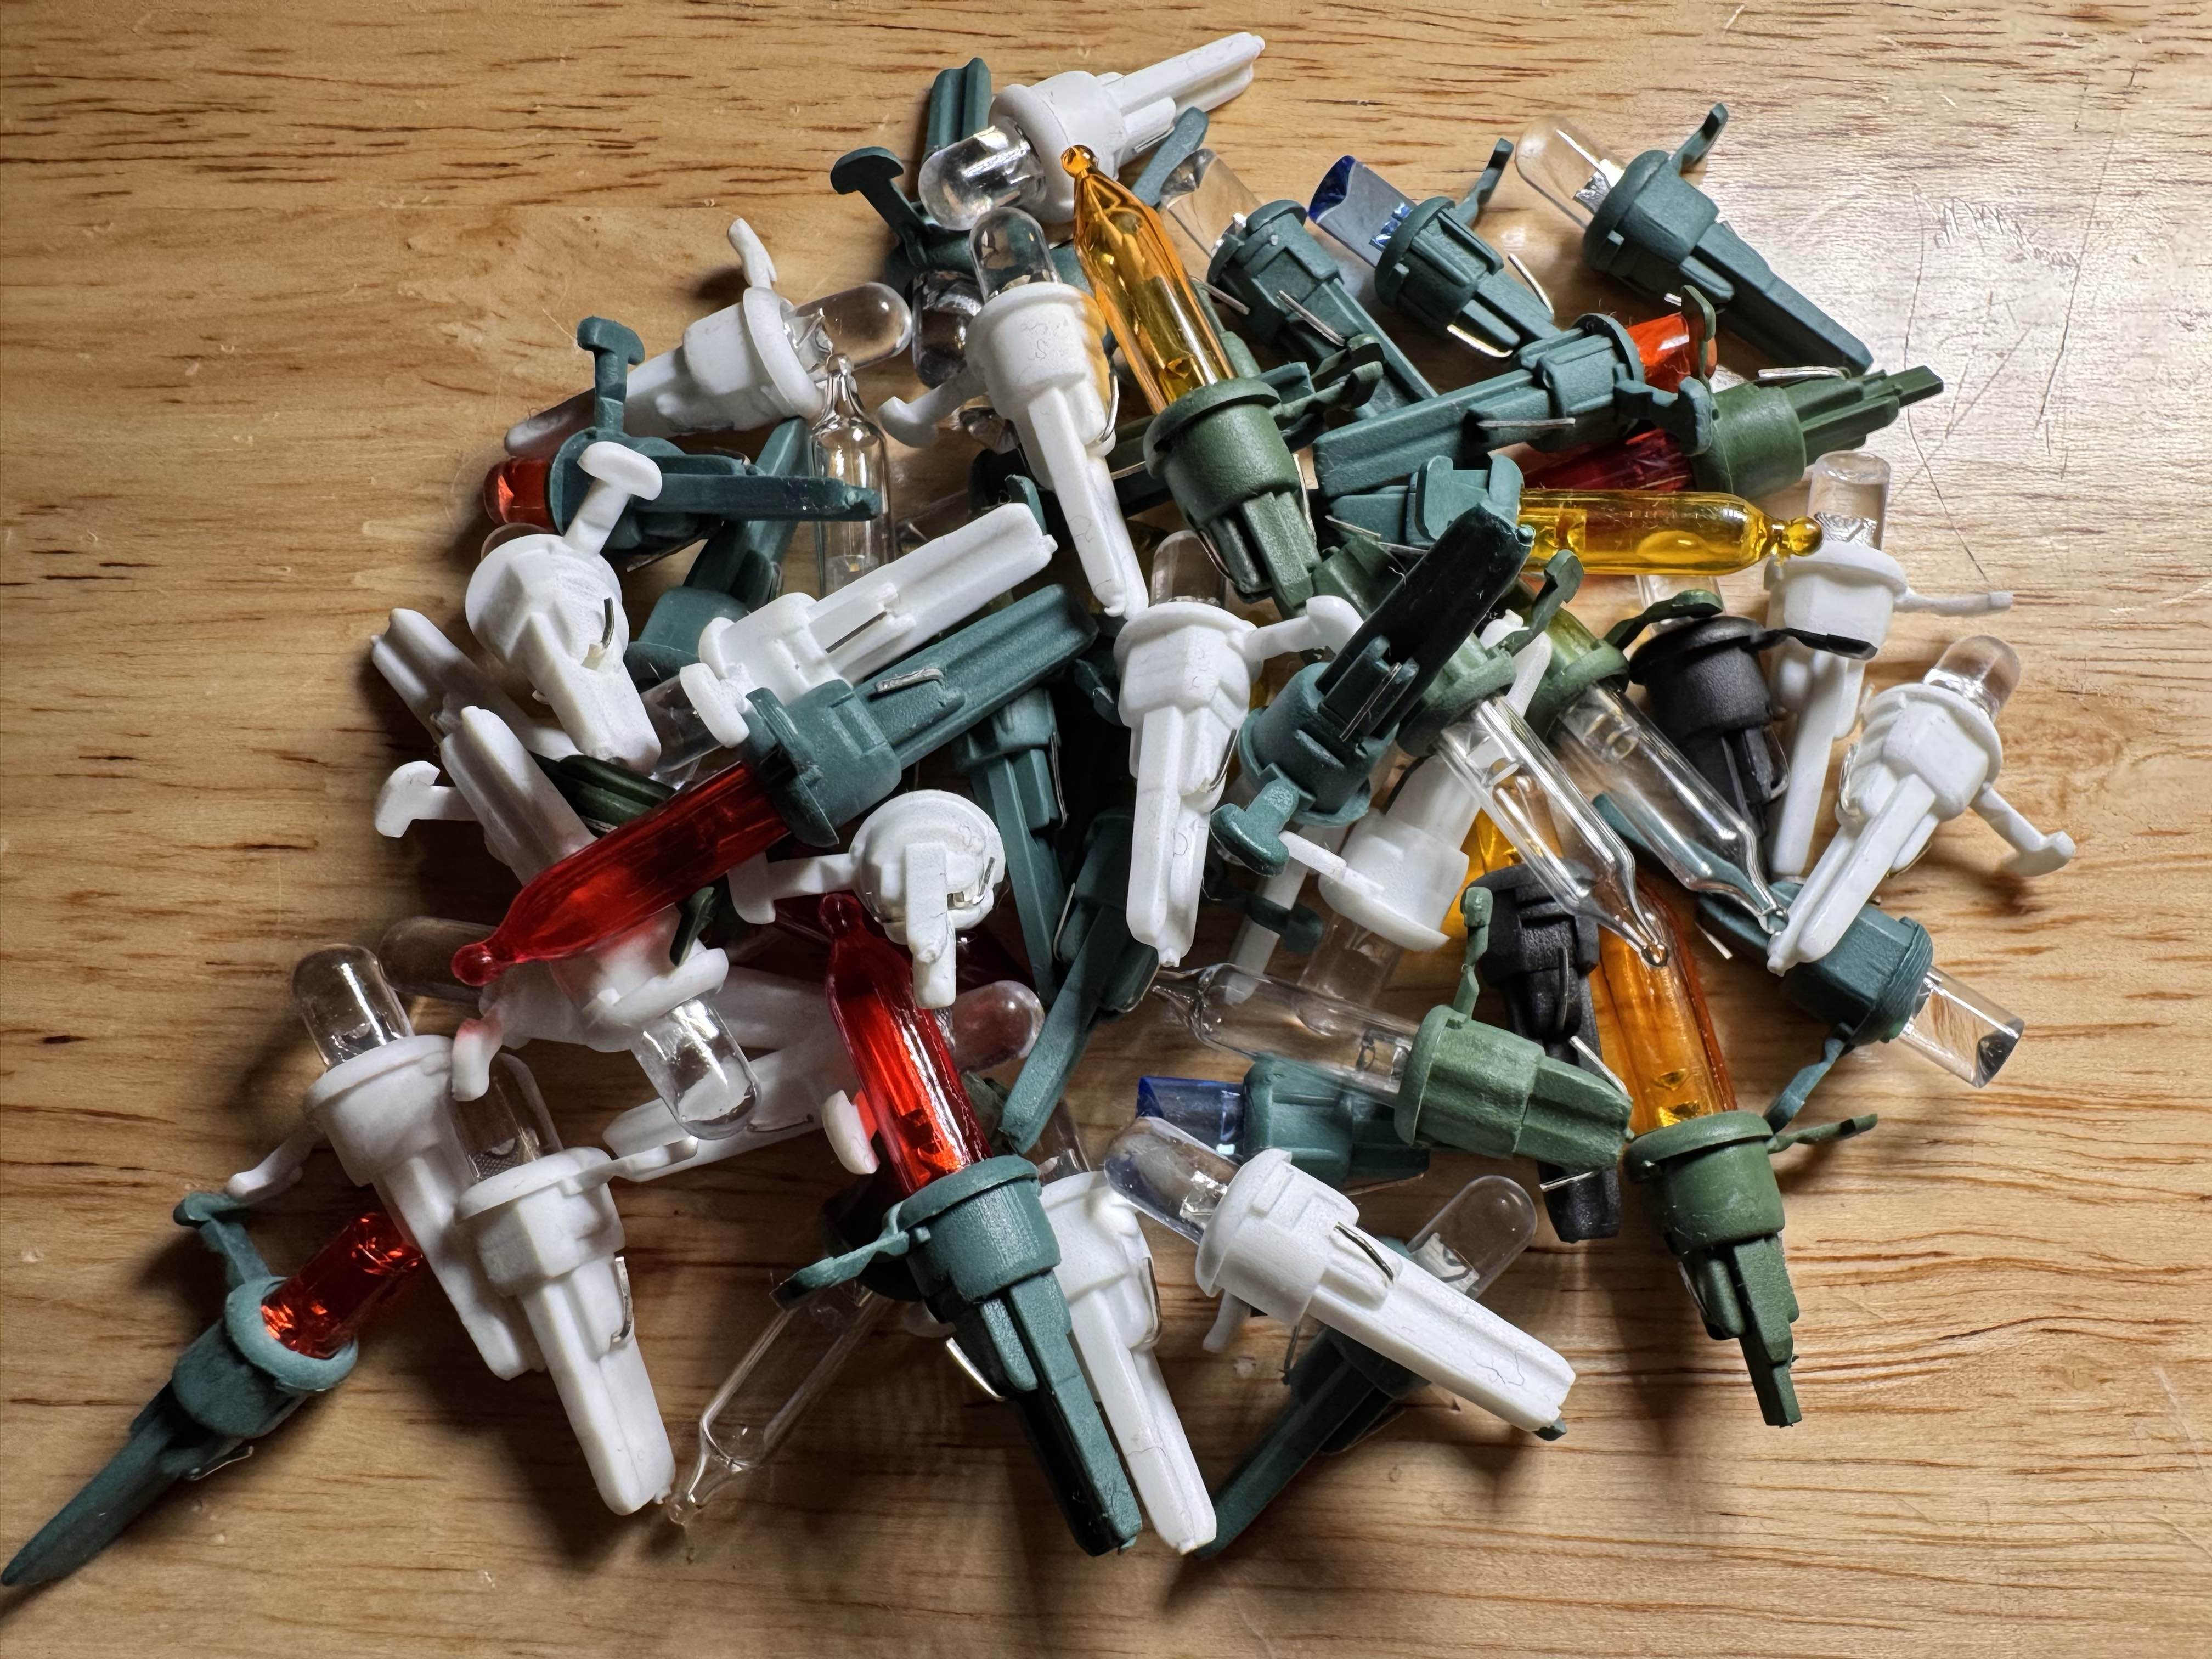
You’ll usually get a pair of spare bulbs with each new set. Unfortunately, that’s not really enough for long-term maintenance if bulbs fall out, burn out, etc.
I also sometimes use replacement bulbs from other sets. Unlike incandescent bulbs, LEDs have a polarity so you need to ensure any replacement bulb you make matches the rest of them in the set. See the next section for some tips on how to ensure you replace them using the correct polarity.
One final note - Over time, you might need to sacrifice one set you can have a decent supply of bulbs to keep the rest operational over time. The LEDs used in these lights sets are shaped a little differently from your common through-hole LEDs, and I haven’t found a good source to just buy new ones yet. If I do, I will post it here. If you know of one, contact me and let me know!
LED polarity
Most of the time, you can just interchange LEDs for Christmas light sets if they fit in the same socket without worrying too much. However, if you don’t have a spare, you might need to use a spare LED from another set that isn’t compatible. You may need to swap the plastic holder the LED is in to make it work.
If you do this, there are two things to note:
- First - you’ll need to be extremely delicate, as noted in the section above - the LED leads do not survive being bent multiple times.
- Second - you need to make sure the polarity is correct. LEDs are directional, unlike incandescent lights.
Typically, I have seen Christmas light LEDs are wired such that the anode (positive) terminal of the LED is towards the clip on the light socket, although this is not a hard-and-fast rule.
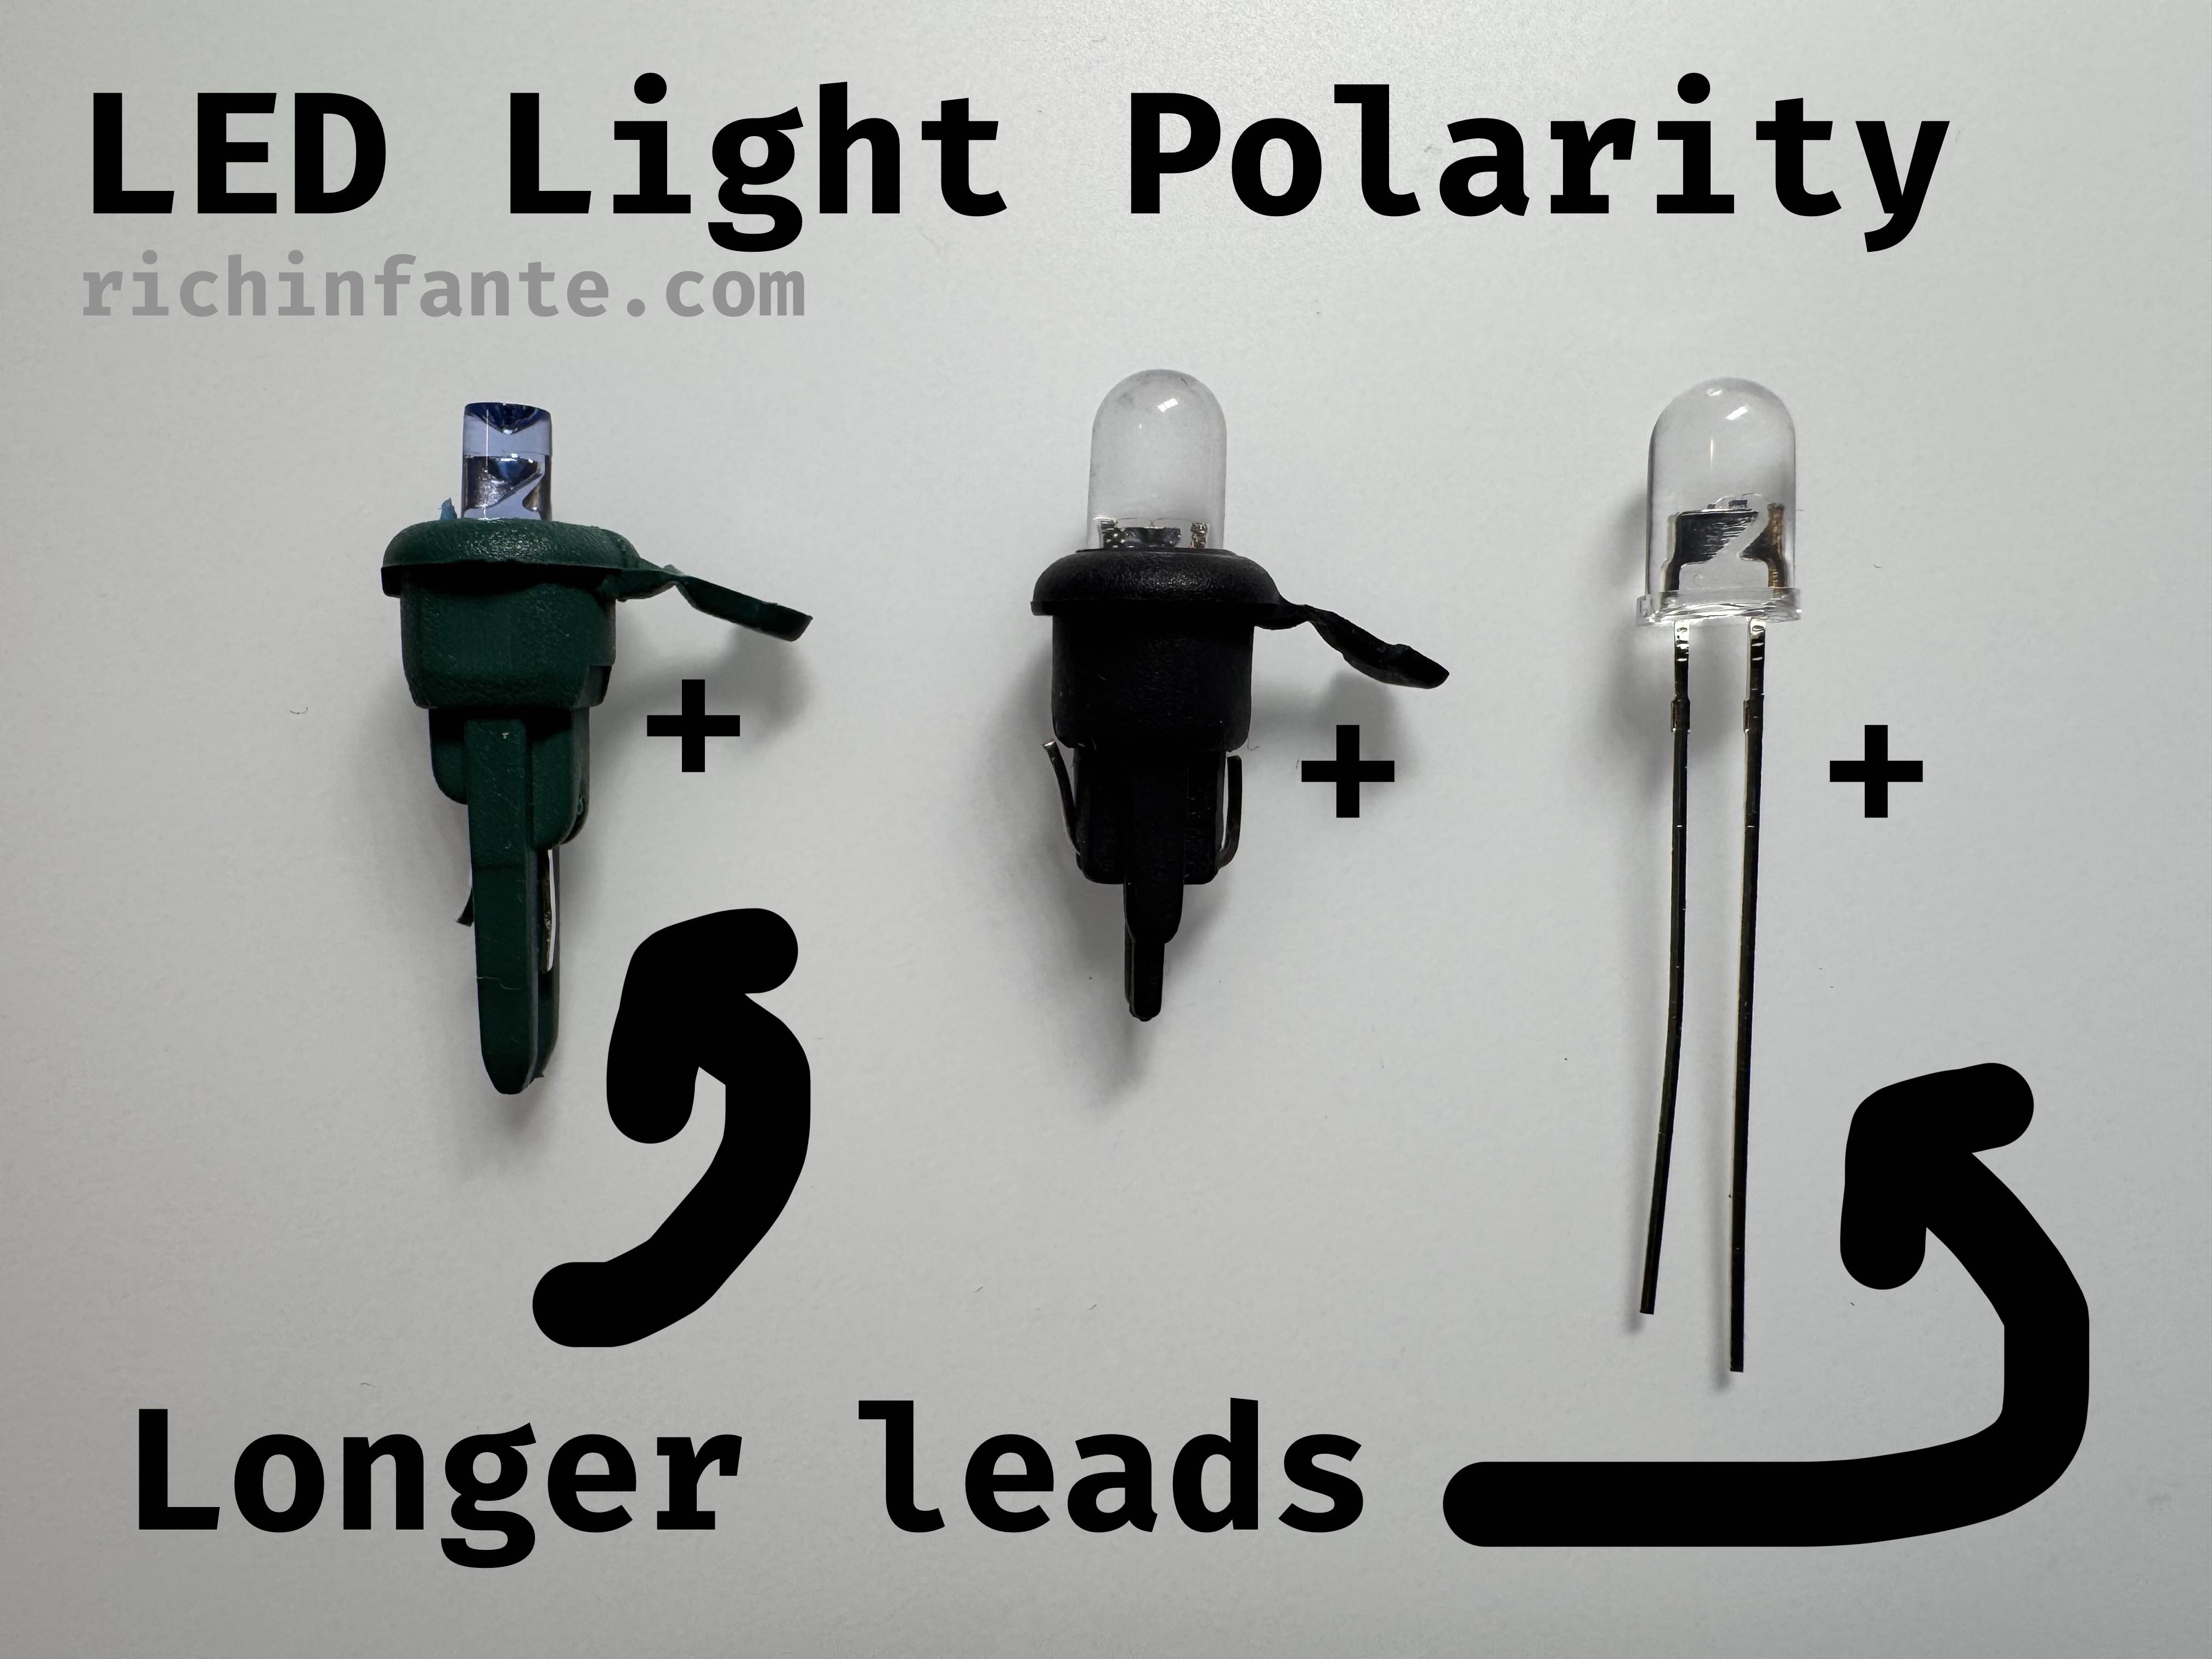
In electronics, LED polarity is either indicated most of the time by the length of the leads (the wires coming off the bottom of the light), or via a flat edge on the lens itself.
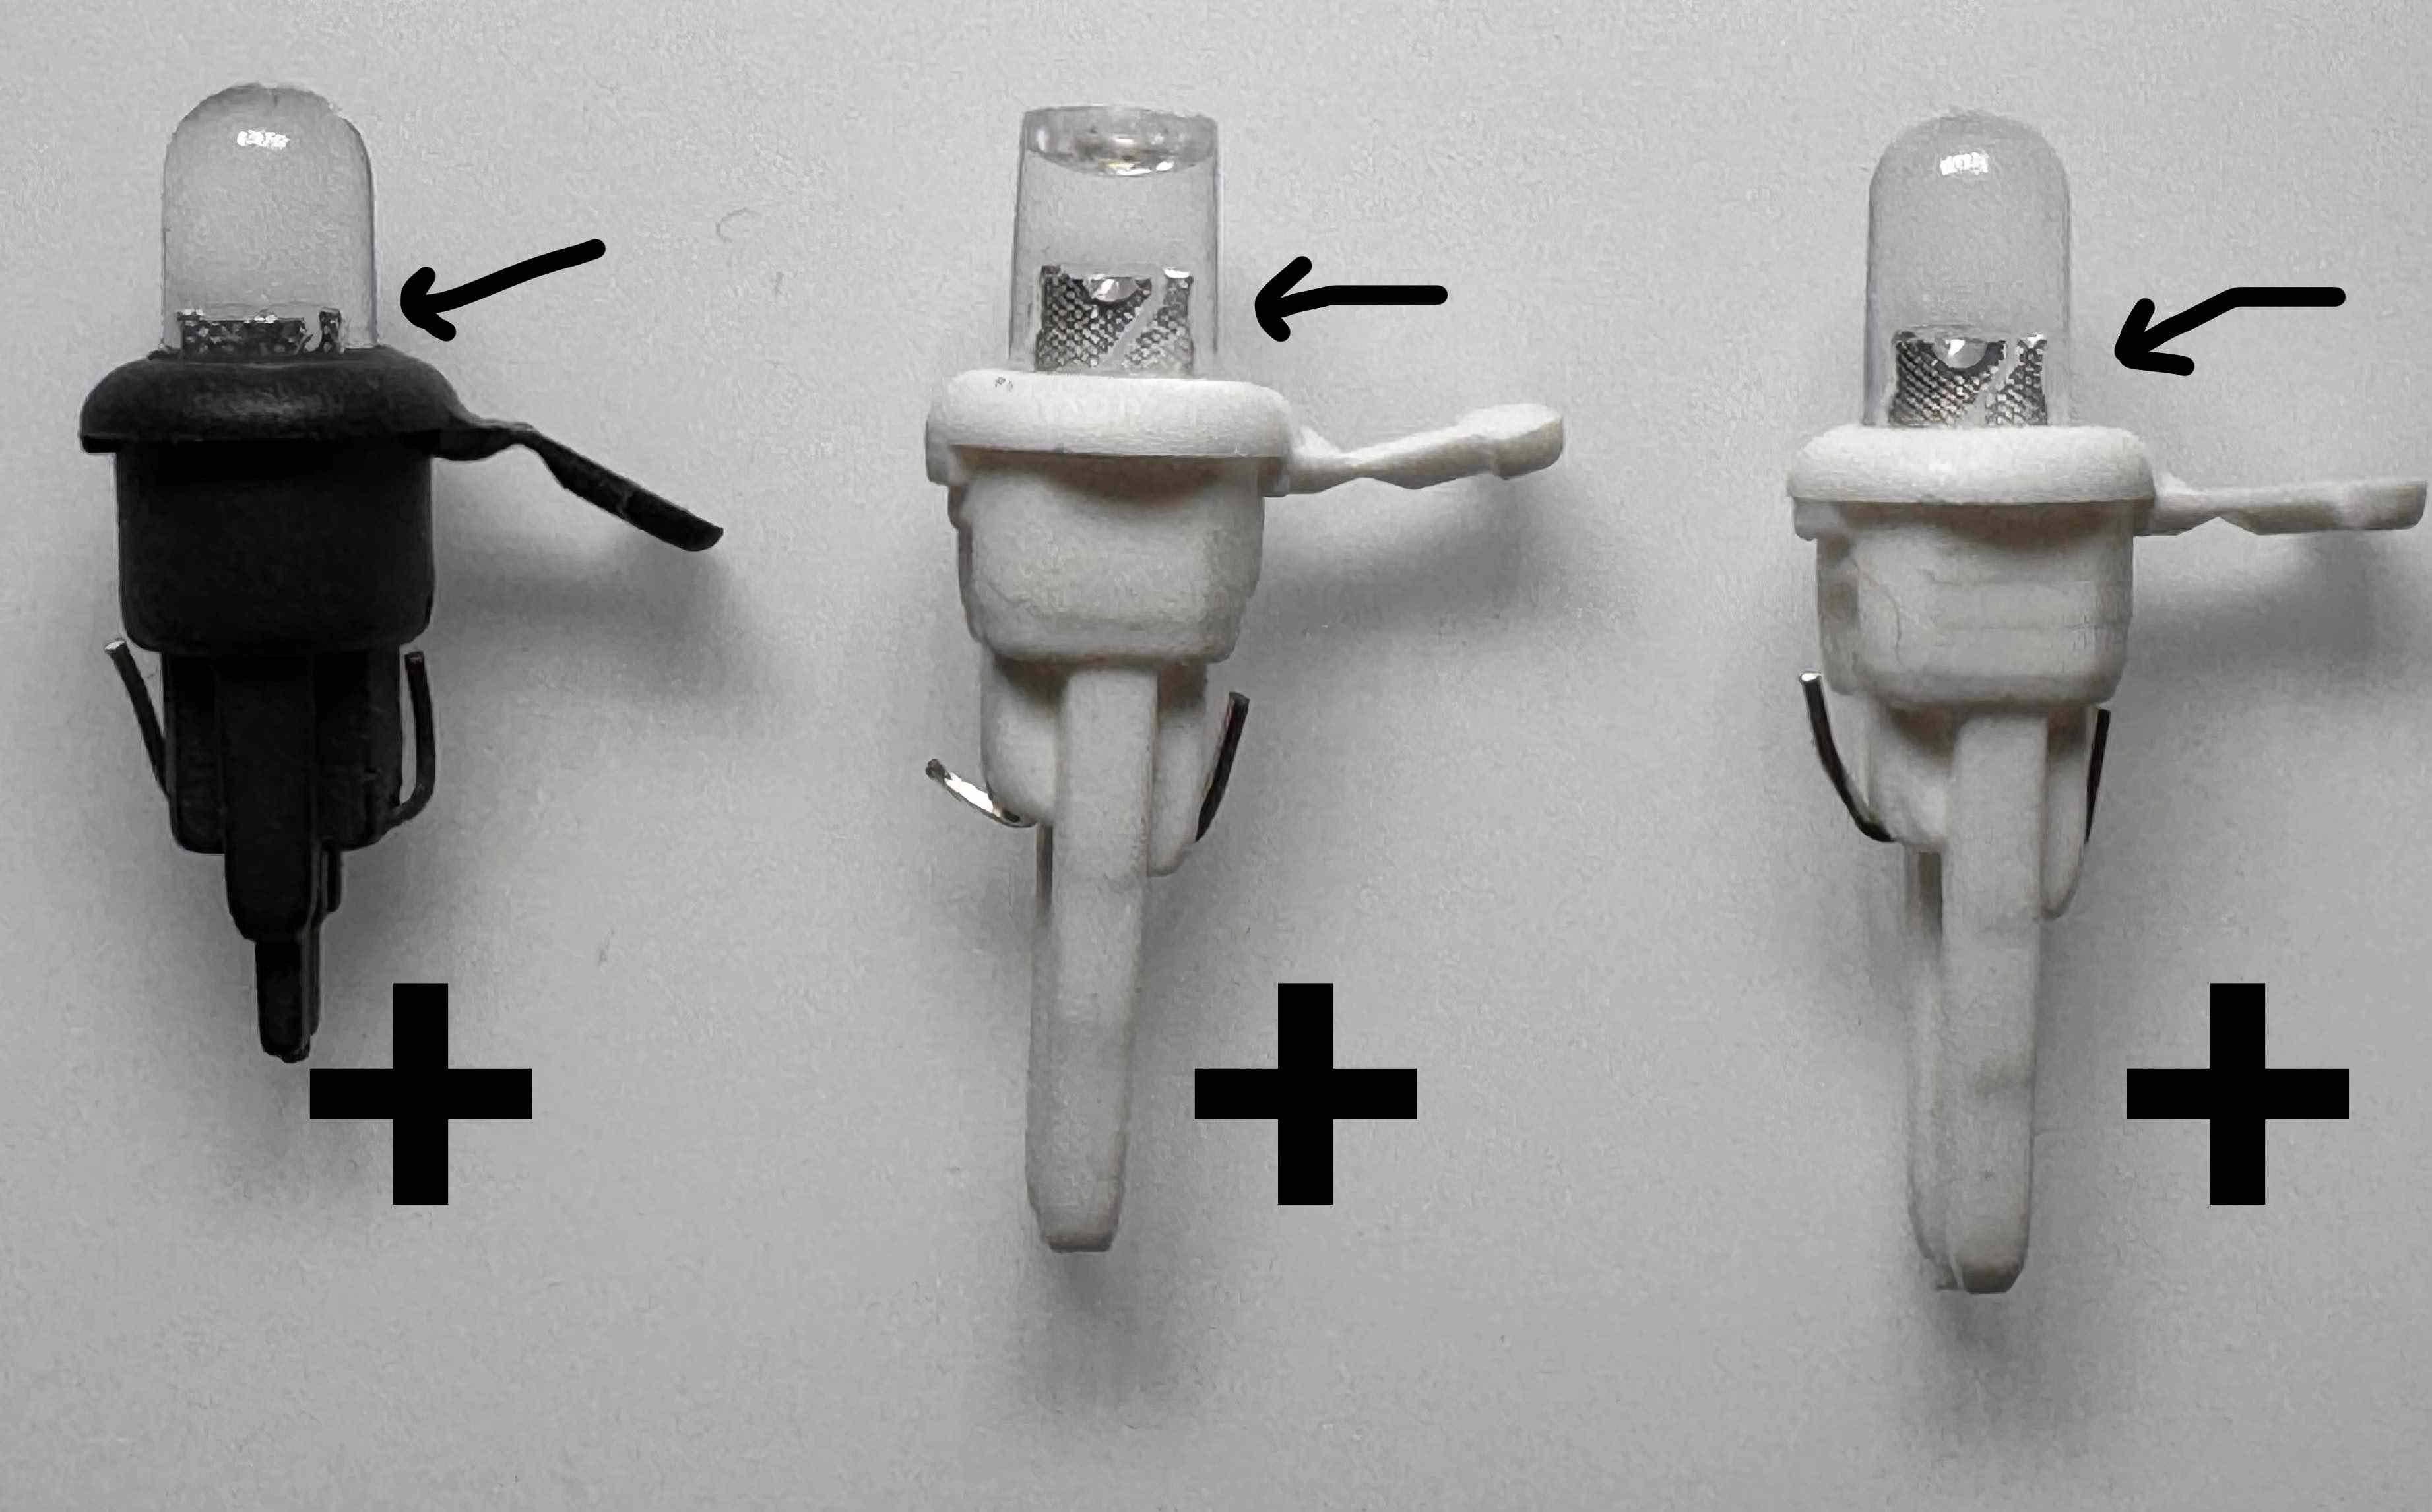
The longer lead is the Anode (positive) and the Cathode is the shorter wire. Some Christmas lights have this built into the housing (see the first one in the above picture). However, some have the leads trimmed to the same length and the bulb holder is symmetrical. I have never seen an LED light for christmas lights that has its Cathode (negative terminal) have a flat side.
If you can’t tell from the leads - there is a way to tell by just looking at the electronics inside the LED itself. There is a metal plate inside, with a slanted cut in it. The smaller and more pointy-looking side is the anode (positive terminal). See the picture below for an example:
Tracking System
For my light strands, I have a tracking spreadsheet, as mentioned before. Each strand has an ID written on both plugs in sharpie - for example 2001, or 1805. The first two digits indicate the year in which it was purchased, so relative age can be determined. The second pair of digits indicates the individual string’s serial number for that year.
These numbers can be then used inside a spreadsheet to track which strands need fixing and of what type they are and where they were purchased.